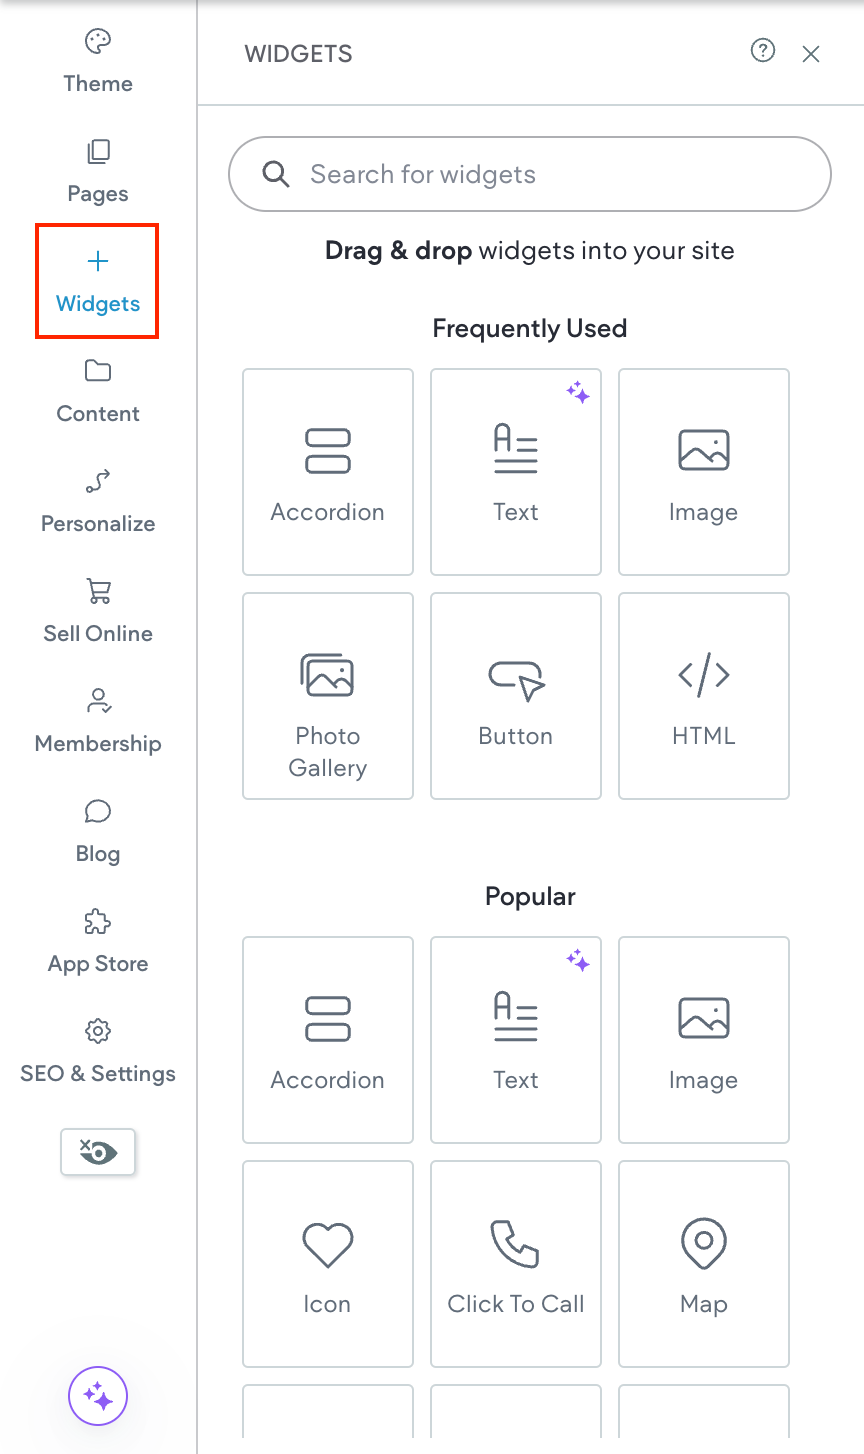
Purpose:
See every widget in one place.
Where to find:
Left side panel then Widgets. Use search at the top or open a category like Basic, Media, Business, Social, Advanced.
Steps:
- Open the editor for your site.
- Click Widgets on the left.
- Type in the search box or click a category to browse.
Quick tip:
Drag a widget onto the page. If it will not drop, move a little until you see the blue placement line.
How to add and edit any widget
Purpose:
Add a widget and make it look and work the way we want.
Where to find:
On the page canvas after you drag the widget on.
Steps:
- Drag the widget onto the page.
- Right click it and select Edit Content
to set what it shows.
- Right click it and select Edit Design
to style how it looks.
- Use the floating menu to duplicate, move or delete.
Quick tip:
Always check desktop, tablet and mobile with the device buttons at the top.
Text
Purpose:
Add paragraphs, lists and basic content.
Where to find:
Basic category.
Steps:
- Drag Text
onto the page.
- Open Edit Content
and type or paste your words.
- Use the toolbar to set heading level, size, links and alignment.
- Open Edit Design
to set font, colour and spacing.
Quick tip:
Keep paragraphs short so the page is easy to read.
Title
Purpose:
Add page headings.
Where to find:
Basic category.
Steps:
- Drag Title
onto the page.
- Open Edit Content
and type the heading.
- Use the toolbar to set the heading level you want.
- Open Edit Design
to match your brand font and spacing.
Quick tip:
Use one main page heading at the top and smaller headings below.
Purpose:
Give people a clear action to click.
Where to find:
Basic category.
Steps:
- Drag Button
onto the page.
- Open Edit Content
then set the button text.
- Click Link
and choose page, URL, popup, anchor or email.
- Open Edit Design
to change style, size and spacing.
Quick tip:
Use short action text like Book now or Get quote.
Accordion
Purpose:
Show answers or long info in easy open and close sections.
Where to find:
Basic or Advanced category depending on your editor.
Steps:
- Drag Accordion
onto the page.
- Open Edit Content
to add items.
- Type a title for each item and add content below.
- Open Edit Design
to set spacing and borders.
Quick tip:
Use for FAQs so the page stays tidy.
Advanced Accordion
Purpose:
Accordion with extra layout and style controls.
Where to find:
Advanced category.
Steps:
- Drag Advanced Accordion
on.
- Add items and content.
- Open Edit Design
for icons, dividers, animations and spacing.
- Test open and close on mobile.
Quick tip:
Keep item titles short so people can scan fast.
Advanced Tabs
Purpose:
Split content into tabs so only one section shows at a time.
Where to find:
Advanced category.
Steps:
- Drag Advanced Tabs
on.
- Open Edit Content
to rename tabs and add content per tab.
- Open Edit Design
to style labels and the active tab.
- Reorder tabs as needed.
Quick tip:
Use tabs for specs, reviews and FAQs in one place.
Breadcrumbs
Purpose:
Show where a visitor is and let them jump back.
Where to find:
Basic category.
Steps:
- Drag Breadcrumbs
onto the header or top of the page.
- It reads the site structure automatically.
- Open Edit Design
to change text and spacing.
Quick tip:
Best on larger sites with many levels.
Purpose:
Mobile friendly menu icon that opens the site menu.
Where to find:
Basic category.
Steps:
- Drag Hamburger Menu
to the header.
- Link it to your main menu if asked.
- Open Edit Design
to set colours, size and alignment.
Quick tip:
Place it top right so people find it fast.
Icon
Purpose:
Add simple graphics to highlight features or link to pages.
Where to find:
Basic category.
Steps:
- Drag Icon
on.
- Choose an icon from the library.
- Optional link to a page or URL.
- Open Edit Design
to change size and colour.
Quick tip:
Keep icon style consistent across the page.
Image
Purpose:
Add a single picture.
Where to find:
Media category.
Steps:
- Drag Image
onto the page.
- Upload or pick from the library.
- Set alt text
so search engines know what it is.
- Optional link the image if needed.
- Open Edit Design
for size, corners and shadow.
Quick tip:
Use compressed images for faster load.
Before and After
Purpose:
Compare two images with a slider.
Where to find:
Media category.
Steps:
- Drag Before and After
onto the page.
- Add the before image and the after image.
- Set the start position of the slider.
- Open Edit Design
for labels and handle style.
Quick tip:
Perfect for makeovers, repairs and edits.
Image Slider
Purpose:
Rotate through a set of images.
Where to find:
Media category.
Steps:
- Drag Image Slider
onto the page.
- Add images in the Content tab.
- Set captions and links if you want.
- Open Edit Design
for arrows, dots, timing and height.
Quick tip:
Keep images the same size ratio to avoid jumpy slides.
Purpose:
Rotate images and videos in one slider.
Where to find:
Media category.
Steps:
- Drag Media Slider
on.
- Add images and video links.
- Order items with drag.
- Open Edit Design
for controls and spacing.
Quick tip:
Use short videos so the slider keeps moving.
Audio
Purpose:
Play a music track or audio clip.
Where to find:
Media category.
Steps:
- Drag Audio
onto the page.
- Upload a file or paste a stream link if supported.
- Add a title if you want.
- Open Edit Design
for player style.
Quick tip:
Auto play can annoy people. Let them press play.
Lottie Animation
Purpose:
Add lightweight animated graphics.
Where to find:
Media category.
Steps:
- Drag Lottie Animation
on.
- Upload a .json Lottie file or paste a Lottie URL.
- Set loop and speed.
- Open Edit Design
for size and alignment.
Quick tip:
Use small file sizes so the page stays quick.
Photo Gallery
Purpose:
Show many images in a grid or other layout.
Where to find:
Media category.
Steps:
- Drag Photo Gallery
onto the page.
- Click Add image
and select many at once.
- Optional enable links on images or use a lightbox.
- Add title, description and alt text for each image.
- Open Edit Design
for layout, columns, rows, spacing, corners and hover effects.
Quick tip:
Turn on lazy loading for speed. Keep captions short.
Social Icons
Purpose:
Show clickable icons to your social pages.
Where to find:
Social or Business category.
Steps:
- Drag Social Icons
onto the page or footer.
- Add or remove networks as needed.
- Paste your profile links.
- Open Edit Design
for size, colour and spacing.
Quick tip:
Only show the networks you actually use.
Purpose:
Let visitors comment on a page using their Facebook accounts.
Where to find:
Social category.
Steps:
- Drag Facebook Comments
onto the page.
- Set the number of comments to show.
- Open Edit Design
for width and spacing.
- Publish so it can load live.
Quick tip:
Place below the main content so it does not distract.
Facebook Like
Purpose:
Let visitors like or share a page.
Where to find:
Social category.
Steps:
- Drag Facebook Like
onto the page.
- Choose like, recommend or share style.
- Set layout and action.
- Open Edit Design
for size and placement.
Quick tip:
Use near the top of blog posts or landing pages.
Facebook Feed
Purpose:
Show a feed of posts from your page.
Where to find:
Social category.
Steps:
- Drag Facebook Feed
on.
- Connect your page.
- Choose what to show.
- Open Edit Design
to fit your layout.
Quick tip:
Public pages work best. Private content will not show.
Purpose:
Display updates from a blog or news source.
Where to find:
Business or Social category.
Steps:
- Drag RSS Feed
onto the page.
- Paste the RSS URL.
- Set how many items to show.
- Open Edit Design
for titles, dates and spacing.
Quick tip:
Use for industry news or your own external blog.
Purpose:
Add a Disqus comment area.
Where to find:
Social category.
Steps:
- Drag Disqus Comments
onto the page.
- Enter your Disqus shortname.
- Set language if needed.
- Open Edit Design
for width and spacing.
Quick tip:
Great when you want one comment system across the whole site.
Business Hours
Purpose:
Show when you are open.
Where to find:
Business category.
Steps:
- Drag Business Hours
onto the page or footer.
- Set each day open and close time.
- Add notes for holidays if needed.
- Open Edit Design
for layout and icons.
Quick tip:
Put hours on the contact page and in the footer.
Click to Call
Purpose:
Make a phone number tap to call on mobile.
Where to find:
Business category.
Steps:
- Drag Click to Call
onto the page or header.
- Enter your phone number.
- Set the label text like Call us.
- Open Edit Design
for colour and size.
Quick tip:
Use big touch friendly size on mobile.
Click to Email
Purpose:
Open the visitor’s email app with your address.
Where to find:
Business category.
Steps:
- Drag Click to Email
on.
- Enter your email address.
- Optional add a default subject.
- Open Edit Design
to match your style.
Quick tip:
Place near your contact form for choice.
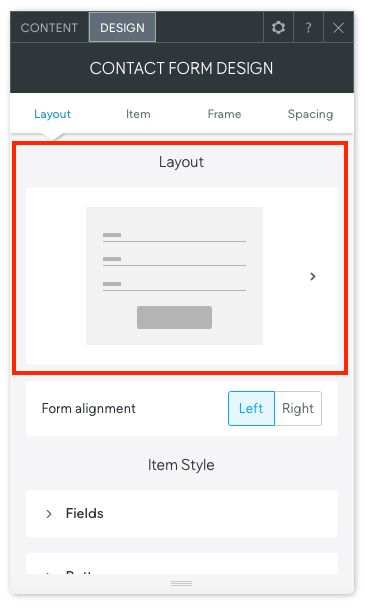
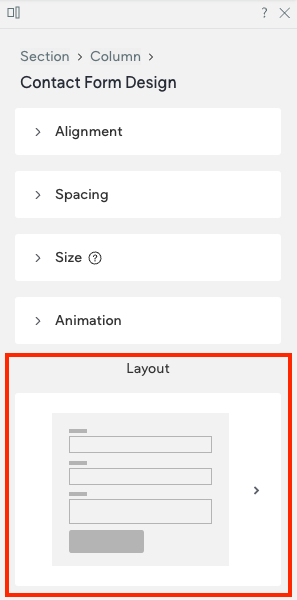
Purpose:
Collect enquiries.
Where to find:
Business category.
Steps:
- Drag Contact Form
onto the page.
- Add or remove fields. Keep it short.
- Set where form emails are sent.
- Add a success message or thank you page.
- Open Edit Design
for layout and spacing.
Quick tip:
Test the form after publishing to make sure emails arrive.
Coupons
Purpose:
Show a code or deal.
Where to find:
Business category.
Steps:
- Drag Coupons
onto the page.
- Enter the code, title and details.
- Set start and end dates if needed.
- Open Edit Design
for card style.
Quick tip:
Keep the code simple to type.
Google Calendar
Purpose:
Show upcoming events.
Where to find:
Business category.
Steps:
- Drag Google Calendar
onto the page.
- Connect your calendar or paste an embed code.
- Choose month, week or agenda view.
- Open Edit Design
for height and spacing.
Quick tip:
Use agenda view if you have many events.
X Feed
Purpose:
Show your latest posts from X.
Where to find:
Social category or add with an HTML embed.
Steps:
- Try the X feed widget and connect your account.
- If it does not load right, go to the X publisher site to generate embed code.
- Drag an HTML
widget on the page.
- Paste the embed code and save.
Quick tip:
Public accounts work best. Private posts will not show to visitors.
HTML
Purpose:
Add custom code like embeds or widgets from other services.
Where to find:
Advanced category.
Steps:
- Drag HTML
onto the page.
- Paste the code snippet.
- Save and preview.
- Adjust spacing in Edit Design
if needed.
Quick tip:
Use trusted code only. Bad code can break the page.
Link Picker
Purpose:
Link any widget to a page, section, popup, file or external URL.
Where to find:
Inside many widgets under Link or in Edit Content.
Steps:
- Click Link
in the widget settings.
- Choose page, section anchor, popup, email, phone or URL.
- If you choose anchor, pick the right section from the list.
- Save and test the link.
Quick tip:
For jump links on the same page, add an anchor to the target section first.
Position, pin and fixed
Purpose:
Control how a widget sits while scrolling.
Where to find:
Edit Design
then Position.
Steps:
- Open Edit Design
for the widget.
- Set Position to Default, Pinned
or Fixed.
- If Fixed, set the on screen position and margins.
- If Pinned, set the offset within its parent.
Quick tip:
Use Fixed for important actions like a floating call button. Use with care so it does not cover other content.
Takeaway
Keep it simple. We drag a widget on, set the content in Edit Content
, style it in Edit Design
, link it with the Link Picker
, and place it neatly with Position. Start with text, titles, buttons and images. Add forms, galleries and sliders when needed. Use social and advanced widgets to boost things. Check on mobile, then publish. Too easy.