Crown Street, Wollongong, 2500

Google Tag Manager Tracking
Melody Jaimon • January 9, 2023
This article will show you how to integrate Google Tag Manager into your website.
This article does not exactly follow Google's instructions, but it has been tested and works properly. The instructions differ from those provided by Google for the following reasons:
- Google requests that you place the code in the site's <head>. This is bad practice for page speed because it slows down the site's loading. As a result, we place it at the bottom of the <body-end> so that it loads last.
- It is more convenient to copy code into a single location.
Add Google Tag Manager
Google will provide you with code embeds that resemble the examples below. Both of these must be installed in the site's body-end. To find the site's body-end>, open the editor's side panel and navigate to Settings, then Head HTML.
The code below is just an example; do not paste it into your site. Please ensure that you obtain the correct Google code.

Set Up Google Tag Manager
This step is critical for enabling Google Tag Manager tracking on your website.
The default All Pages page view trigger must then be replaced with our custom event. We must first create the custom event trigger within the tag manager:
- Sign in to Google Tag Manager.
- Click Triggers on the left.
- Click the new button on the right side.
- At the top left, give the trigger a name. Something memorable and useful, such as Custom Page View Trigger, is recommended.
- Select Custom Event from the custom trigger configuration box.
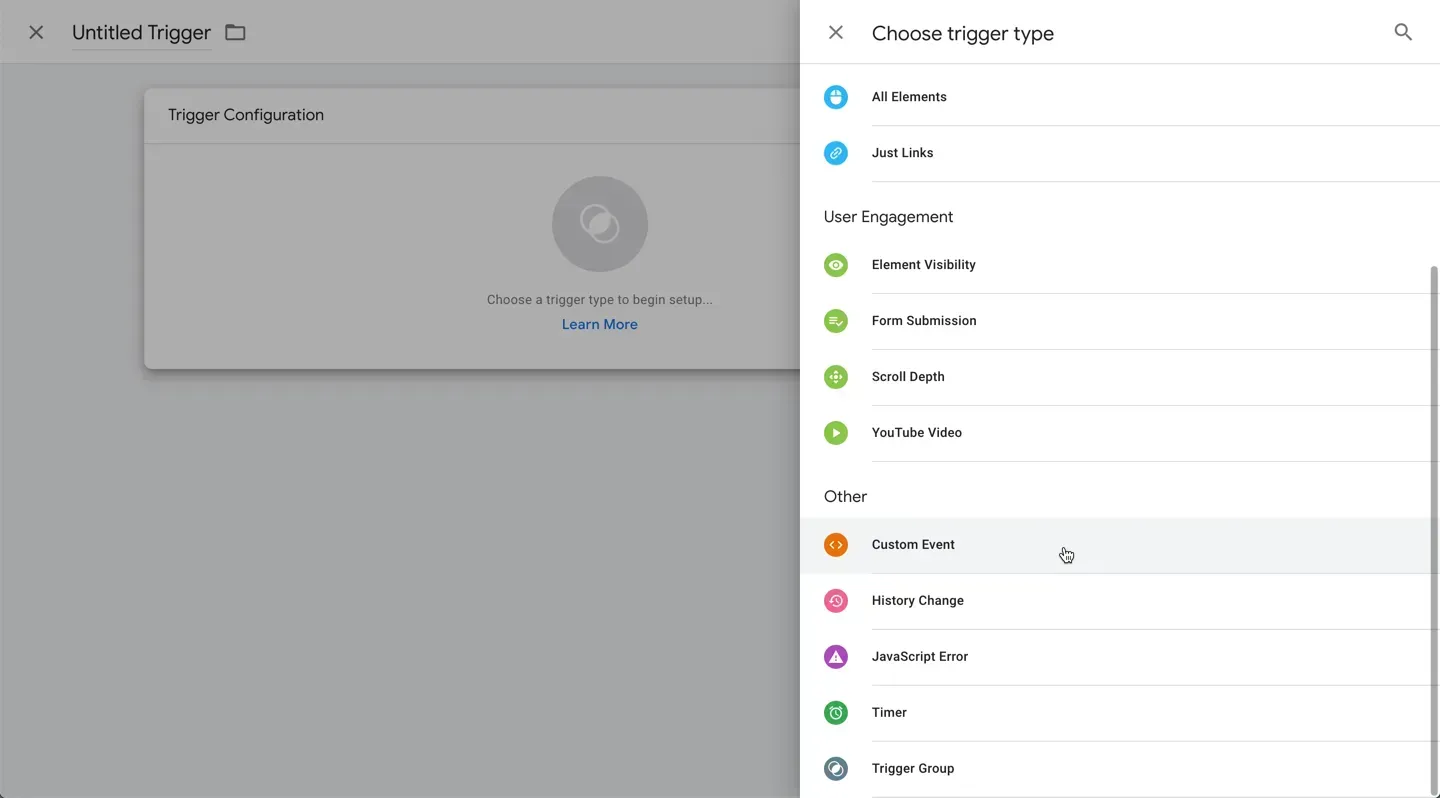
6. Enter dPageView in the event name box.
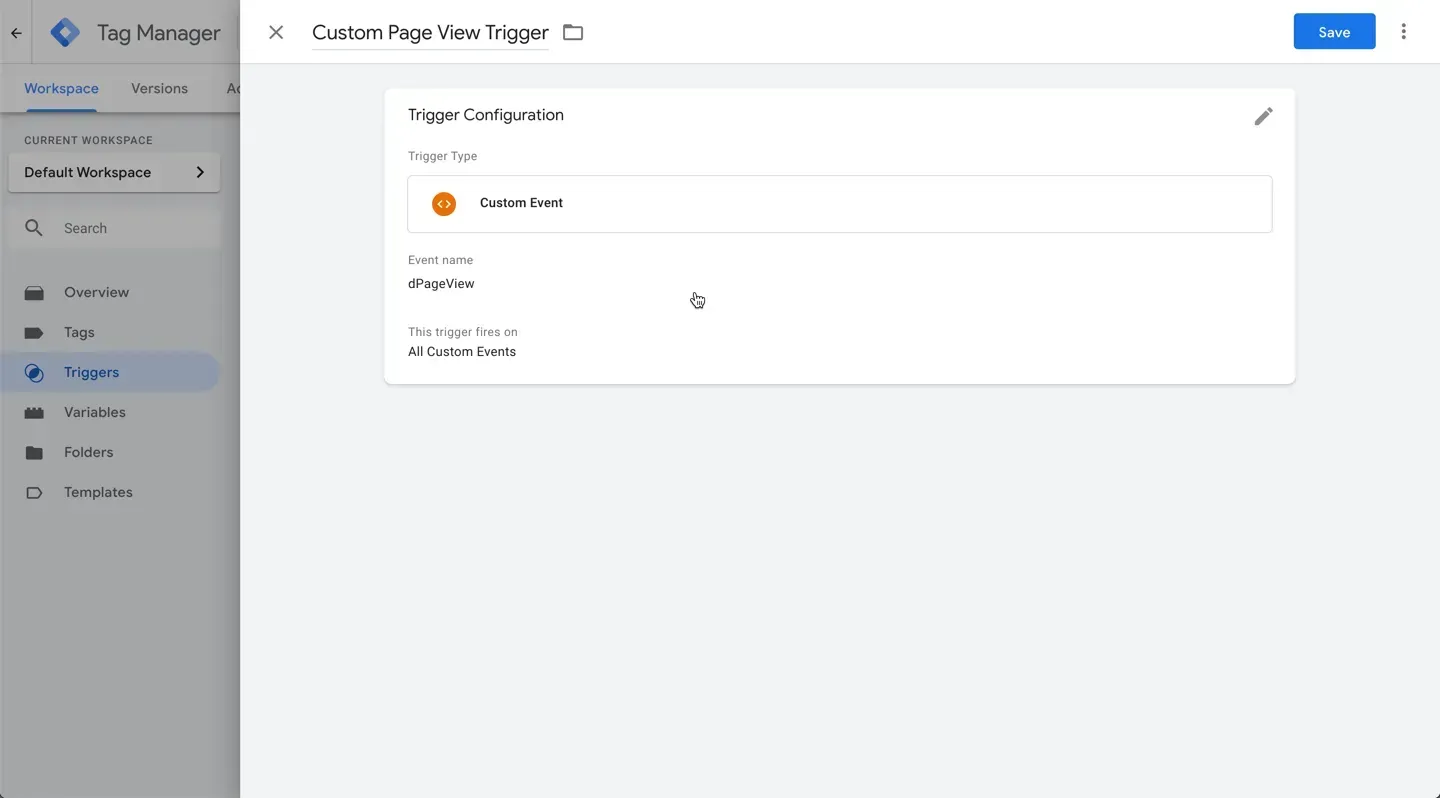
7. In Tag Manager, click the Save button.
After creating the trigger, we must apply it to the desired tags. This must be done for each tag used on the site to trigger page view events. In this case, we'll use Google Analytics Universal.
- Navigate to tags in Tag Manager.
- Make a new tag.
- Make your name memorable.
- Select the tag you want to use by clicking the Tag Configuration box. Google Analytics Universal in this case.
- After you've finished configuring the tag, check the Triggering box. Select the Custom Page View Trigger that we created.
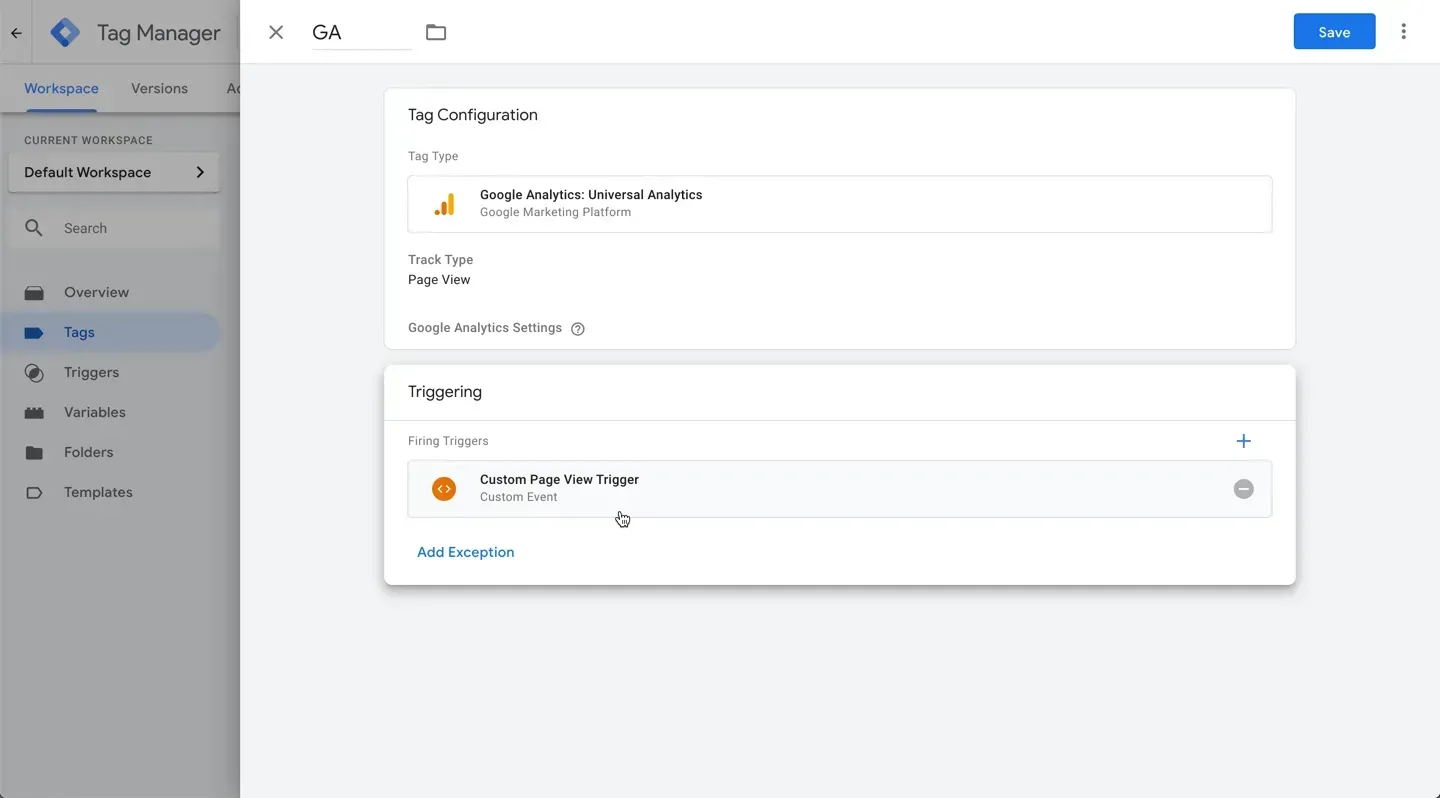
If the All Pages trigger is already active, please remove it. The only thing we need is for the custom trigger to fire.
6. Choose a new variable.
7. Navigate to Google Analytics Settings.
8. At the top, enter your GA tracking ID and a name for your variable.
9. Select the variable and press the Save button.
After you've made these changes to Tag Manager, click
Submit and then
Publish
to make the changes live.
Considerations for Google Tag Manager
- This code will only be executed on the live published website. Make certain that you test it on the live version.
- We have completed extensive testing, and the body-end.html section of Developer Mode is functional for adding noscript and default code.
- Changes to the 'dataLayer' setting in Google Tag Manager will break our custom integration code.


Love My Online Marketing has 10+ Years of working alongside businesses and helping them grow. Discuss your options for online success from website Design and Development through to Google Marketing.
Do you want more traffic and business leads?
Love My Online Marketing is determined to make a business grow. Our only question is, will it be yours?