Crown Street, Wollongong, 2500

How to Organise Your Gmail Inbox Using Labels and Filters
Melody Jaimon • September 29, 2021
Your Gmail should be a tool for productivity, not a distraction. However, many people often struggle to keep their Gmail inboxes from turning into the latter due to lack of proper email organisation.
Without practicing proper email organisation, your Gmail inbox will get out of control soon, eventually reaching a point where trying to respond to your customer’s emails becomes a tedious endeavour due to all the important emails being mixed up with all sorts of unnecessary junk.
Fortunately, Gmail comes with several features that make the task of managing your emails a breeze. In this blog post, we will give you detailed instructions on how to use these features so that you are always on top of your emails.
Organise Your Gmail Inbox
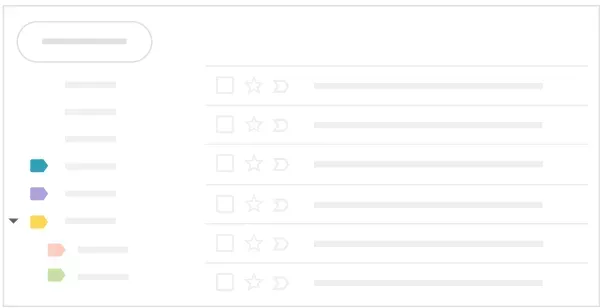
Using Gmail’s labels and filters, you can manage your emails with relative ease. You can also move emails out of your inbox and transfer them to another location. Labels can be used to categorise your email. Labels are like folders, but you can add multiple labels to an email and find it later by clicking its appropriate label from the left panel. You can also search emails by label by typing the label name in the search bar above.
Labels can also be used to:
- Track the status of an individual’s tasks. For example, create the labels “Charlotte: In Progress” and “Charlotte: Done” to indicate emails that Charlotte is working on or has finished.
- Organise email by nesting labels or creating labels under a label (like subfolders). For example, create the label To Do. Under To Do, create a label for each person.
- Determine which emails require follow-up.
- Determine which emails need to be read later.
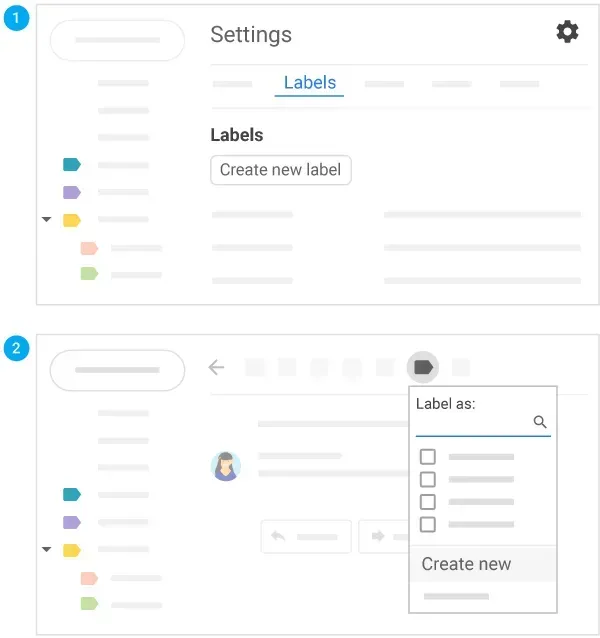
How to create labels
- Create a label:
- Open Gmail.
- At the top right, click Settings -> See all settings.
- Click the Labels tab (between General and Inbox).
- Go to the Labels section below and click on Create new label.
- Enter the label name and click Create.
- There is a 255-character limit for Gmail label names.
- You can also nest labels under an existing label (like creating subfolders).
- Create a label from an email:
- From an email, on the menu above, click LabelsCreate new.
- Type in the label name and click Create.
- (Optional) Click
Nest label under and pick an existing label to place it under. The new label immediately applies to your email.
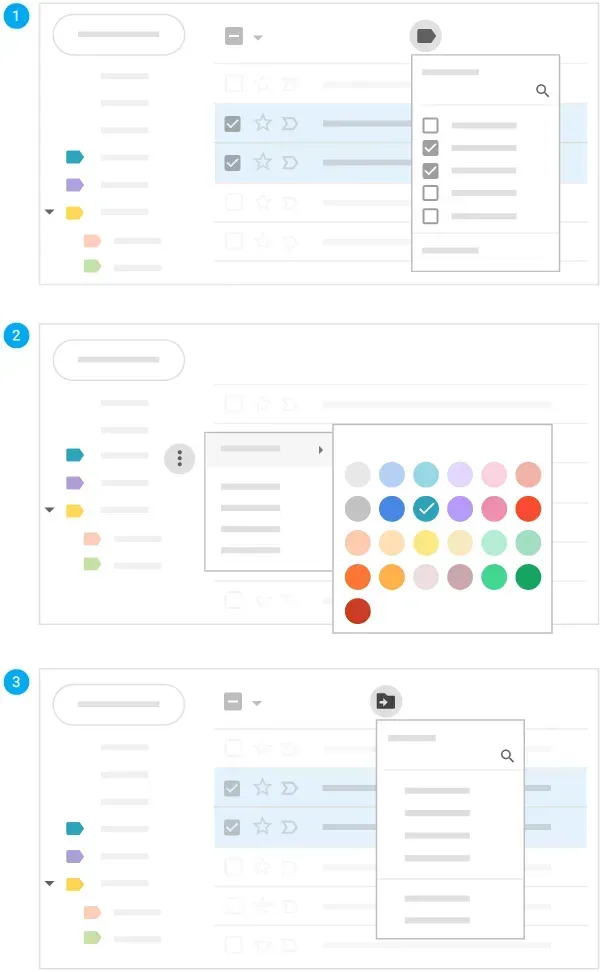
How to apply labels
- Apply labels to your emails:
- In your inbox, tick the checkboxes next to the emails you want to apply a label to.
- Click Labels .
- Tick the checkboxes next to the labels that you want to apply to the emails and click Apply.
- Apply a colour to a label:
- In the left panel, hover your mouse pointer over to a label and click More .
- Go to Label colour and select the colour that you want. Alternatively, you can click Add custom colour and choose a background colour and text colour that you like. The change immediately applies to all emails with that label.
- (Optional) To remove a label colour, simply click Remove colour in the Label colour area.
- (Optional) To view all emails with a specific label, click the label’s name in the left panel.
- Move email from your inbox to a label:
- In your inbox, tick the checkboxes next to the emails you want to move into a label.
- In the upper menu, click Move to .
- Click on the label you want to move your emails to.
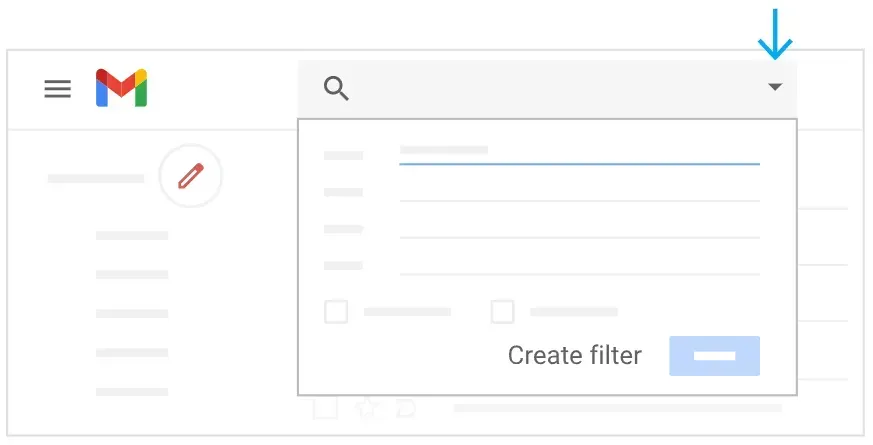
How to add filters
- Manage your incoming emails automatically using Gmail’s filters.
- Open Gmail.
- In the search bar above, click the Down arrow.
- Type in your search criteria. You can check if your search worked accordingly by looking at which emails show up when you hit Search.
- At the lower part of the search window, click Create filter.
- Pick the actions that you’d like the filter to do.
- Click Create filter.
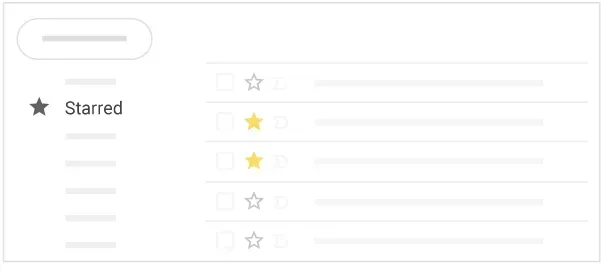
Star important email
- You can mark an email as important by clicking the Star icon next to it. You can do this to both emails in your inbox and emails within a conversation.
- To view all emails you marked as important, in the left panel, click on Starred.
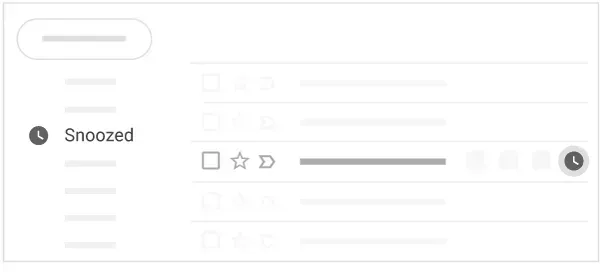
How to snooze email
- Snooze emails and postpone them to a future date or time that’s more convenient for you.
- Open Gmail.
- Hover your mouse pointer over to an email.
- On the far-right end of the email, click on the Snooze icon.
- Pick a date and time that works best for you. The email immediately snoozes and gets moved out of your inbox. You will receive a reminder about the snoozed email after the time you specified.
- (Optional) You can view all snoozed emails by clicking Snoozed in the left panel.
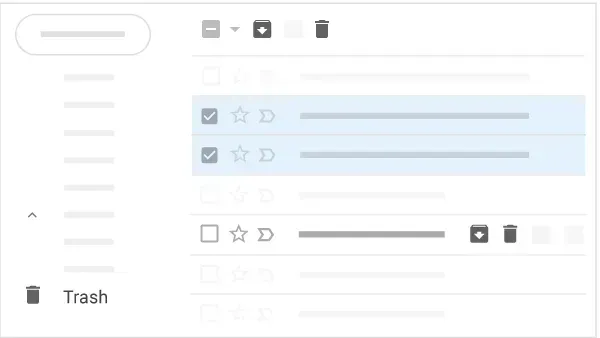
How to archive or delete email messages
- When you archive an email, it gets moved out of your inbox but remains under All Mail. Emails that have been deleted are transferred into the Trash, where they will get automatically deleted permanently after 30 days.
- To archive or delete an email, select the email by ticking the checkbox next to it. At the menu on top, click
Archiveor
Delete. Alternatively, you can hover your mouse point over a single email and click
Archiveor
Delete
on the right side of the email.
Takeaway
Now that you know how to organise your Gmail inbox using labels and filters, staying on top of all your emails will become much easier. Gone are the days when essential emails were located in the same place as unnecessary clutter. Gone are the days when your productivity was affected by all the chaos in your inbox.


Love My Online Marketing has 10+ Years of working alongside businesses and helping them grow. Discuss your options for online success from website Design and Development through to Google Marketing.
Do you want more traffic and business leads?
Love My Online Marketing is determined to make a business grow. Our only question is, will it be yours?