Crown Street, Wollongong, 2500
Customise Store Design
You have free reign over the appearance of your eCommerce store, including the widgets and layout. By personalising the design and atmosphere of your store, you can enhance the presentation of your products to customers.
If you want the products from the product gallery widget to link to the store, you must include the Main Store widget on at least one page of your site. If not, when a customer clicks on a product, they will receive a 404 error.
Add Categories to Site Navigation
This option will not be available if your store does not have categories.
Here are the steps on how to add store categories to the main site navigation:
- Click eCommerce on the editor’s side panel.
- Select one of the following options from the Add category pages to site navigation drop-down menu:
- Do not add option excludes category pages in site navigation.
- Beside site pages option includes category pages as top-level navigation pages. To determine where to place the category pages in the site navigation, select an option from the Where do you want to place them drop-down menu.
- As subpages
option includes category pages in the navigation as subpages of a specific page. Select a page from the
Add as subpages drop-down menu.
Add Store Widgets
Store widgets may be moved or removed from any page of your site by dragging them like any other widget. For further information, see Add Widgets.
To add a new store widget, select eCommerce tab, then Add Store Widgets on the left panel. To customise a specific widget's appearance, right-click the widget on the site and select
Edit Design.
Edit Store Design
se the Global Design settings on the Design tab to modify the look of your store or click the Main Store widget to access specific design options.
- To access the global design settings, click Design on the left panel.
- To access the design editor, right-click the Main Store widget and select Edit Design.
General
- Select Edit Design by right-clicking the Main Store widget.
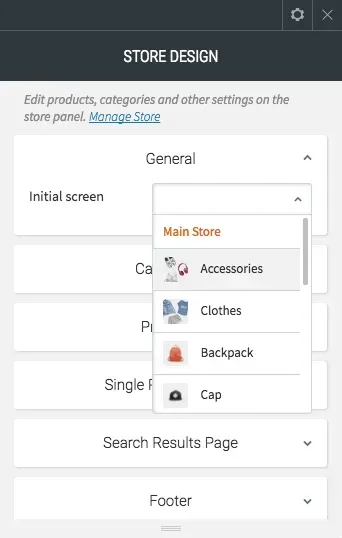
- To configure the store widget’s first screen, click General and select a page from the Main Store drop-down menu. You may select whether to display the main store or one of your categories as the first page of your store widget.
Categories and Products
The Design Editor can be used to customise the layout of the Categories and Products pages.
- Right-click and select Edit Design from the Main Store widget.
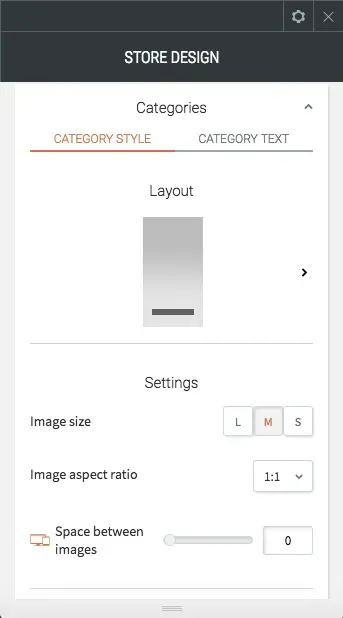
- Change the layout and text formatting for different areas of text, such as category/product titles, price, and SKU, by clicking
Categories
or
Products. This menu allows you to change the spacing between items, element behavior (hover effects), and the number of products displayed on a page.
You can display up to 100 categories and subcategories in your store. For instance, if you have 10 categories and each of them has 50 subcategories, only the 2 categories with the 50 subcategories will be displayed.
Single Product Page
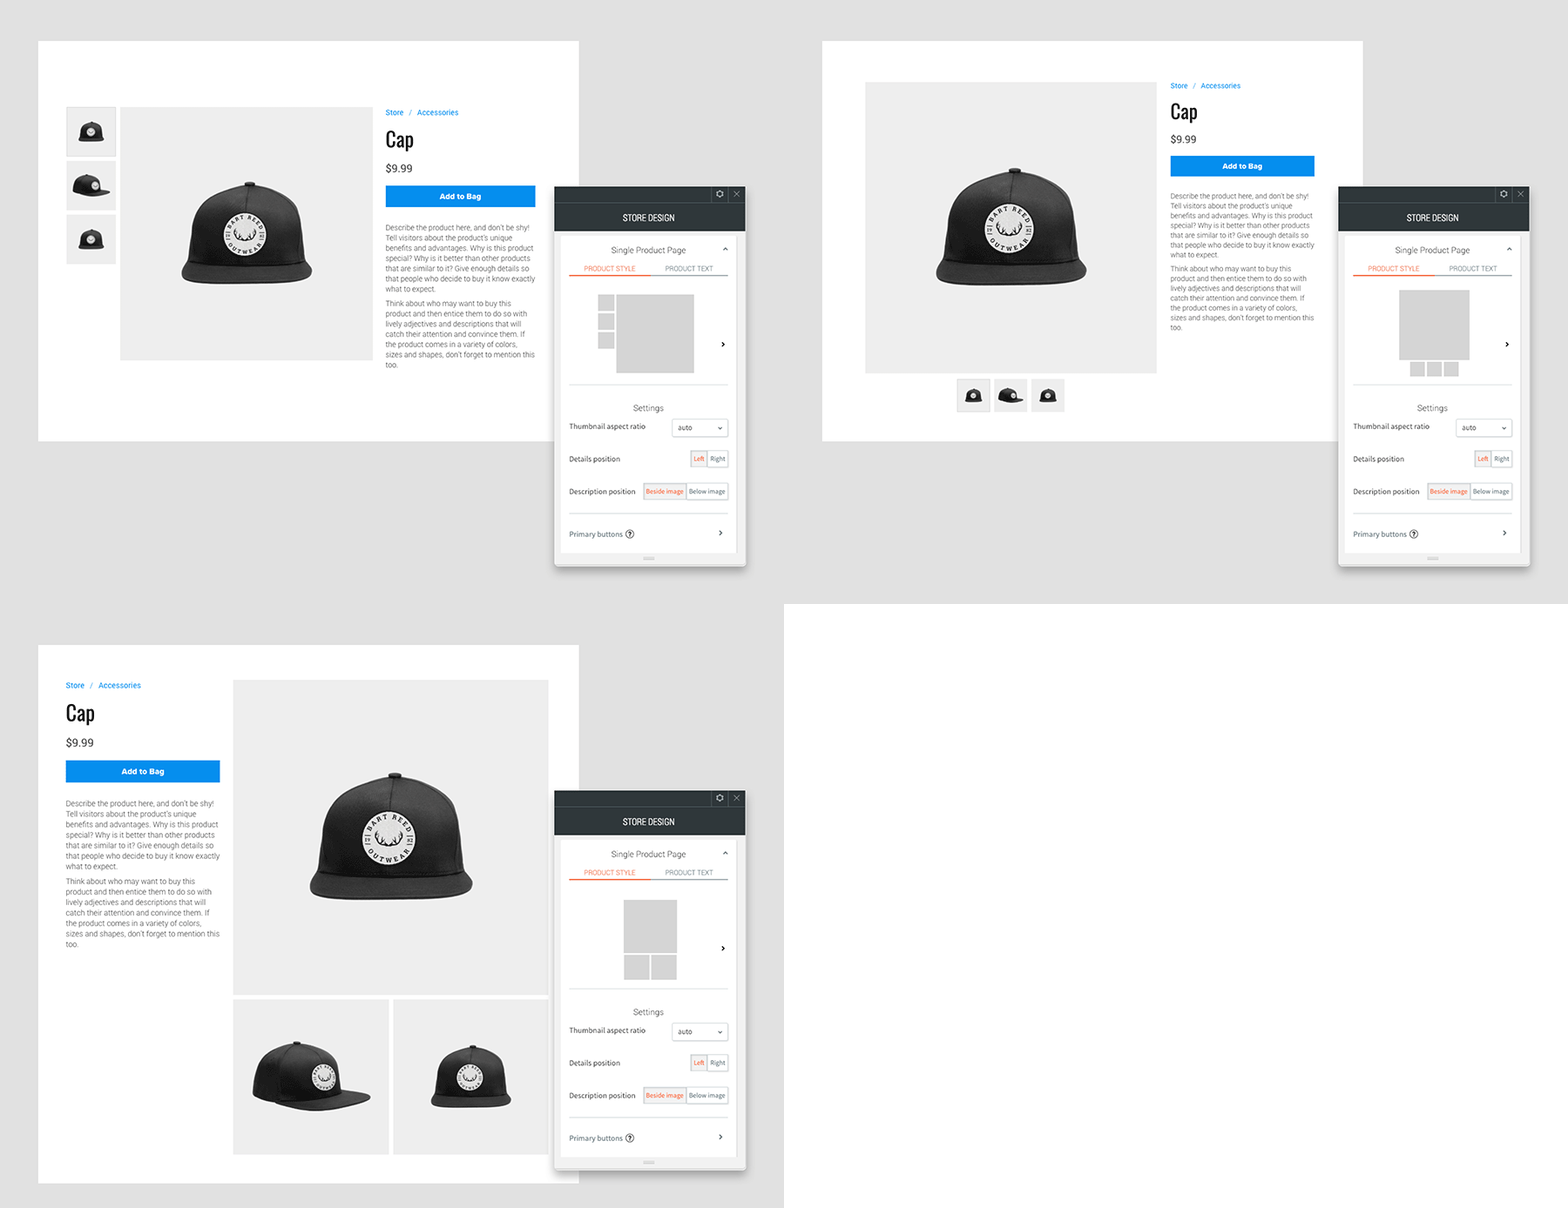
Using the Design Editor, you can also edit elements on the pages for a single product. You can choose from different layouts to display items on each product page. You can also change elements such as text location and how thumbnail images are laid out. With these new customisation, you can showcase your products in the best way possible.
- Right-click the Main Store widget, and select Edit Design.
- Click Single Product Page.
The hover background and frame color cannot be changed to anything other than white.
Cart & Checkout
The cart and checkout title, subtitles, and link style can all be configured.
- Right-click the Main Store widget and select Edit Design.
- Click the
Cart
and
Checkout
button.
Customise Breadcrumb Style
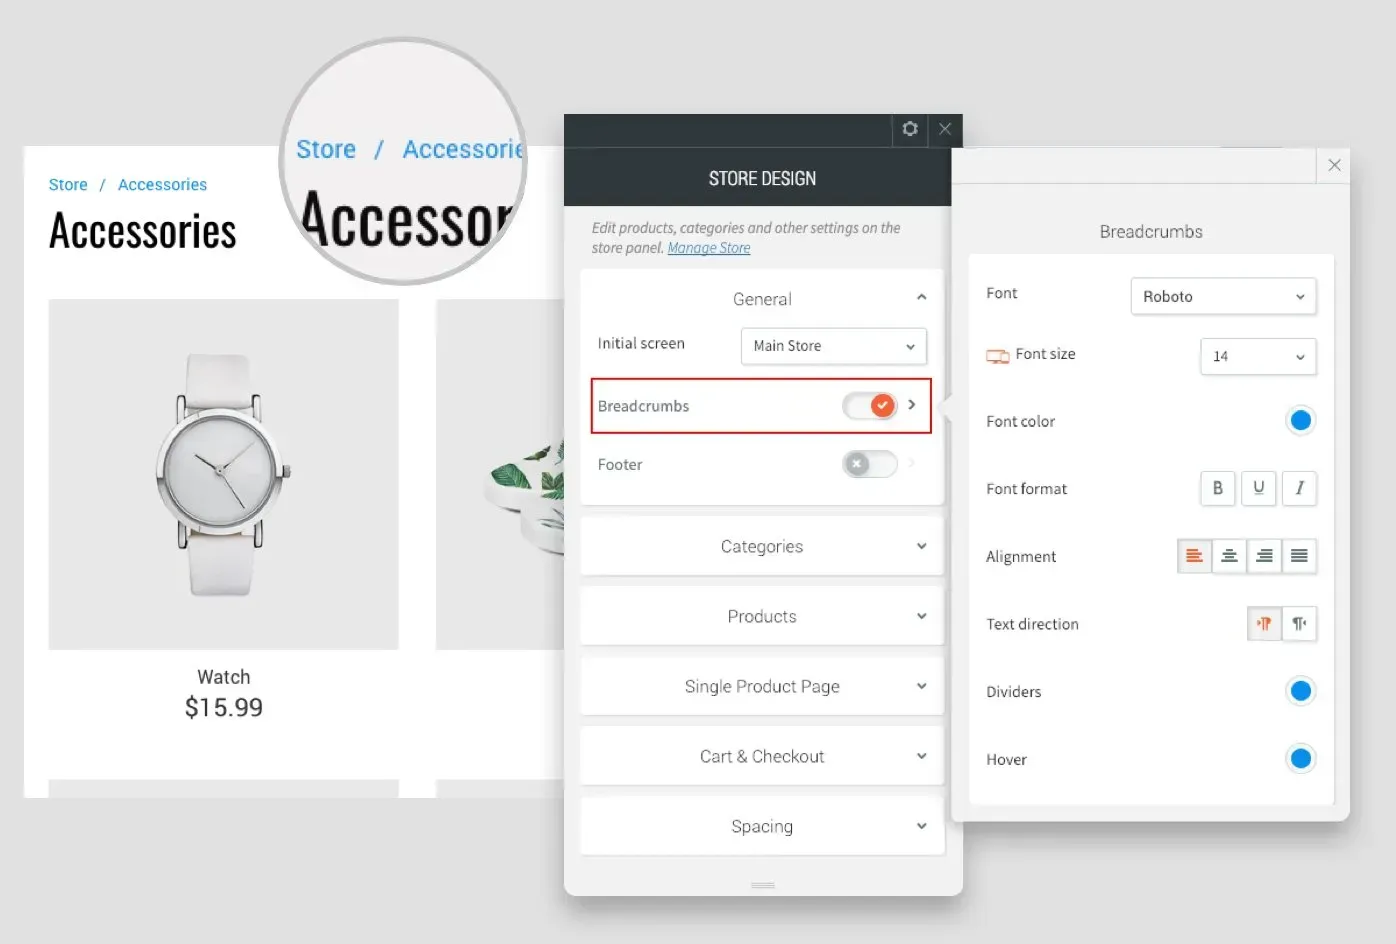
Enable breadcrumbs on store pages and customise their style so that customers can easily see where they are in the store.
Change Default Text Labels
Follow these steps to change the default text labels in your store:
- Click eCommerce tab on the left panel, then click Manage Store.
- Select Apps on the Store Manager panel, and then click Install StoreFront Label Editor.
- Tap Add + Custom Label.
- Search the label you want to modify and click Find This Label.
- Enter a new label name in the field provided on the right.
Reorder Products in a Category
To change the order of the products in a category, do the following:
- Click eCommerce tab then select Catalogue.
- Tap Categories, and then click Category products.
- You can now select and drag the products into the desired order.
Product Filters
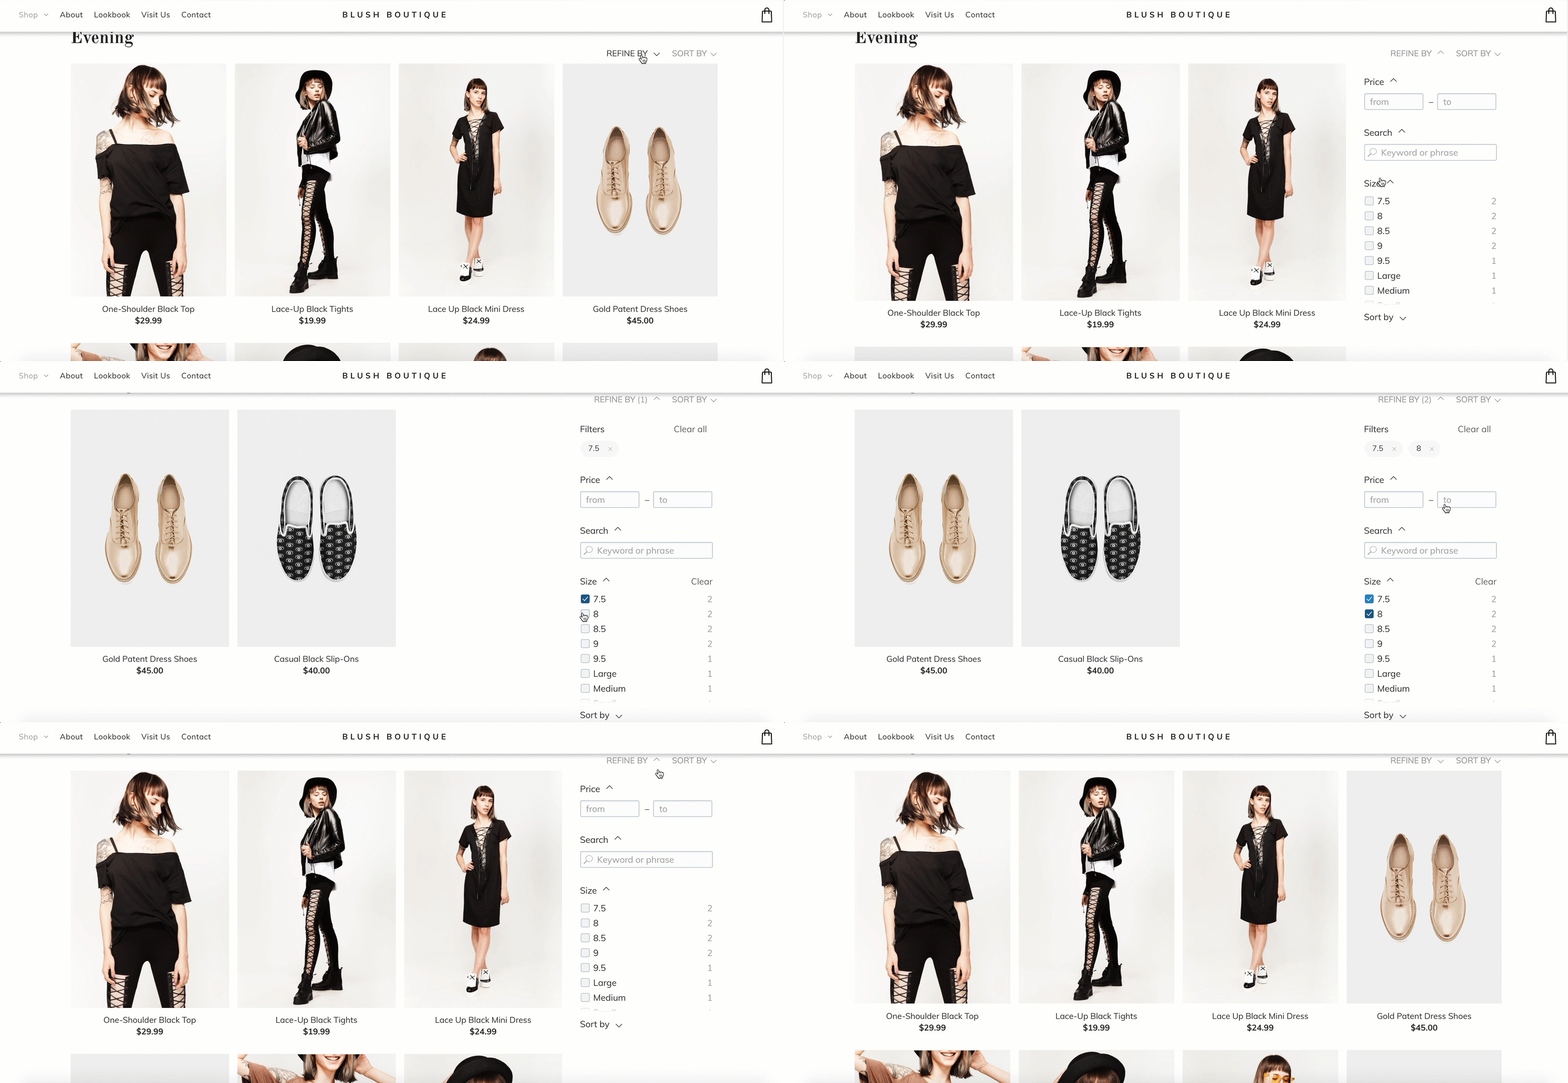
You can add product filters to assist customers in locating the products they need. Using this method, customers can quickly find and buy the products in your store.This is useful if your inventory has a large range of products. Simply configure the filters based on price,inventory level, promotions, keywords, product options, and attributes.
Product Filters are accessible only in the Advanced Store and higher.
Everything can be set up quickly. Your store's optimal filters are pre-configured depending on the amount of products, product options and attributes, enabled promotions, product stock levels and more. There’s a filter update once you add, remove, change or sell products in the store. Every time your customers visit your site, they will view the most up-to-date filters.
Enable Product Filters
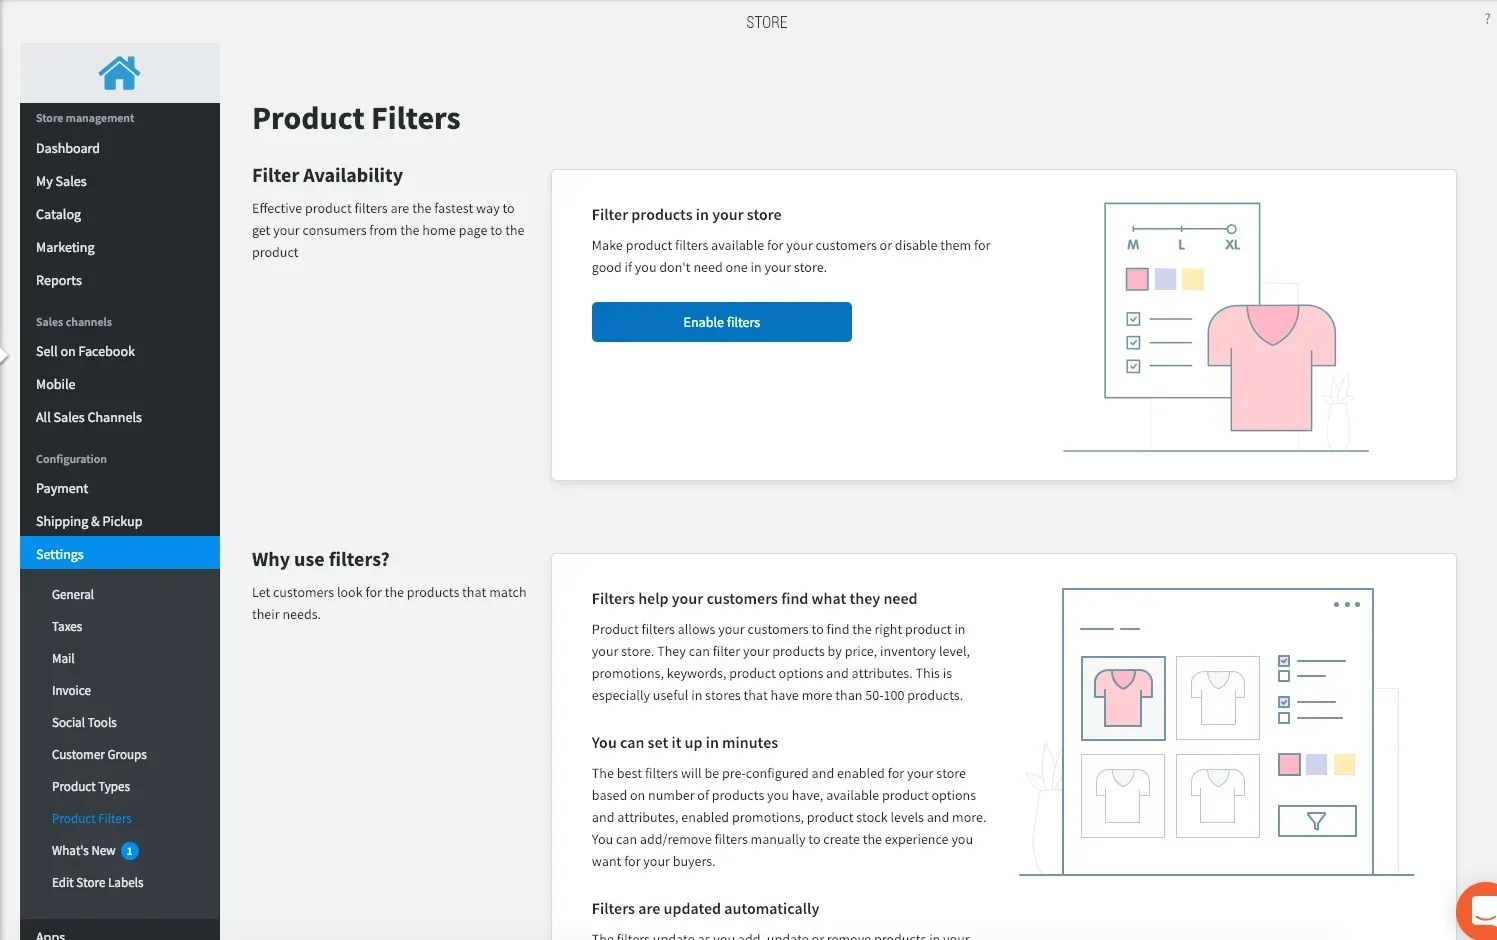
- Go to the Store Control Panel.
- Select Settings, and then click Product Filters.
- Click Enable Filters.
- Choose the filter you wanted to present.
FAQs

Love My Online Marketing has 10+ Years of working alongside businesses and helping them grow. Discuss your options for online success from website Design and Development through to Google Marketing.
Do you want more traffic and business leads?
Love My Online Marketing is determined to make a business grow. Our only question is, will it be yours?


