Crown Street, Wollongong, 2500

How to Add DKIM Authentication for Improved Email Security
Melody Jaimon • May 25, 2022
Email is one of the most important tools for communication in business, but it can also be one of the most not secure. This blog post will show you how to add DKIM authentication to your email to improve email security. DKIM authentication adds an extra layer of protection to your email and makes it less likely that your emails will be intercepted or blocked by spam filters.
What is DKIM authentication?
Before setting up DKIM authentication, it is important to understand how it works. DKIM stands for DomainKeys Identified Mail. It is an email validation system that uses cryptographic signatures to authenticate emails. When an email is sent, the DKIM signature is added to the header of the email. The receiving server can then use the public key in the signature to verify that the claimed sender indeed sent the email and that it has not been tampered with.
Setting up DKIM authentication usually requires access to your DNS records. If you are not comfortable making changes to your DNS records, you may want to contact your hosting provider or IT department for assistance. Once you have access to your DNS records, you will need to generate a DKIM key and add it to your DNS.
How DKIM Helps Prevent Spoofing and Spam
Below are some ways DKIM helps prevent email spoofing and spam:
Prevents Spoofing
DKIM is an email authentication standard that adds a digital signature to outgoing messages. Receiving mail servers that receive DKIM-signed messages can verify that the messages came from the sender and not someone impersonating the sender. DKIM also ensures that message contents are not changed after being sent.
When receiving servers can confirm that messages are from you, they are less likely to be marked as spam.
DKIM authentication increases the likelihood that legitimate messages will reach recipients' inboxes. Receiving servers can confirm that messages are genuine and not forged.
Deliver Messages to Recipients’ Inboxes
DKIM assists receiving email servers in verifying that messages are indeed from the organisation specified in the email. Servers are less likely to mark messages as spam when they can verify that they are from your organisation. Because the receiving server can validate that the message came from your domain and is not forged, this helps ensure that messages are delivered to recipients' inboxes.
Setting Up DKIM authentication for your Domain
Turning on DKIM will protect your domain from email spoofing & phishing, help prevent messages from being marked as spam, and help improve your deliverability. Here are the steps you need to take to set up DKIM for your domain:
Step 1: Get the DKIM key in your Admin console
Important: After you've enabled Gmail for your company, you have to wait 24-72 hours before you can retrieve your DKIM key in the Admin console. If you try to create a key before the waiting period is up, you may receive this error: DKIM authentication settings update failed.
1. Log in to your Google Admin console.
2. Use an administrator account to log in, not your regular email.
3. From the Admin console Home page, choose Apps > Google Workspace > Gmail.
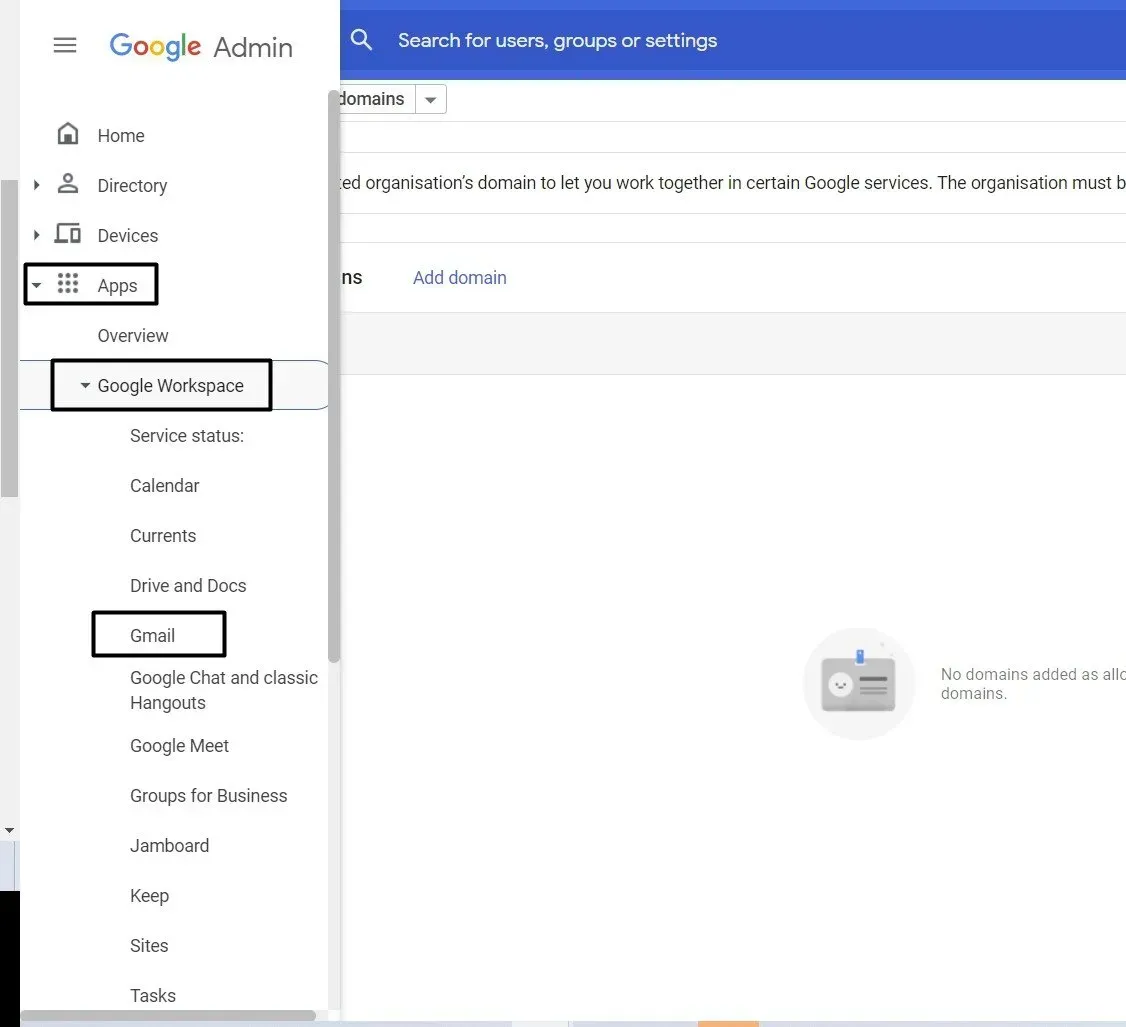
4. In the Selected domain menu, select the domain where you want to turn on DKIM.
5. Click Authenticate email.
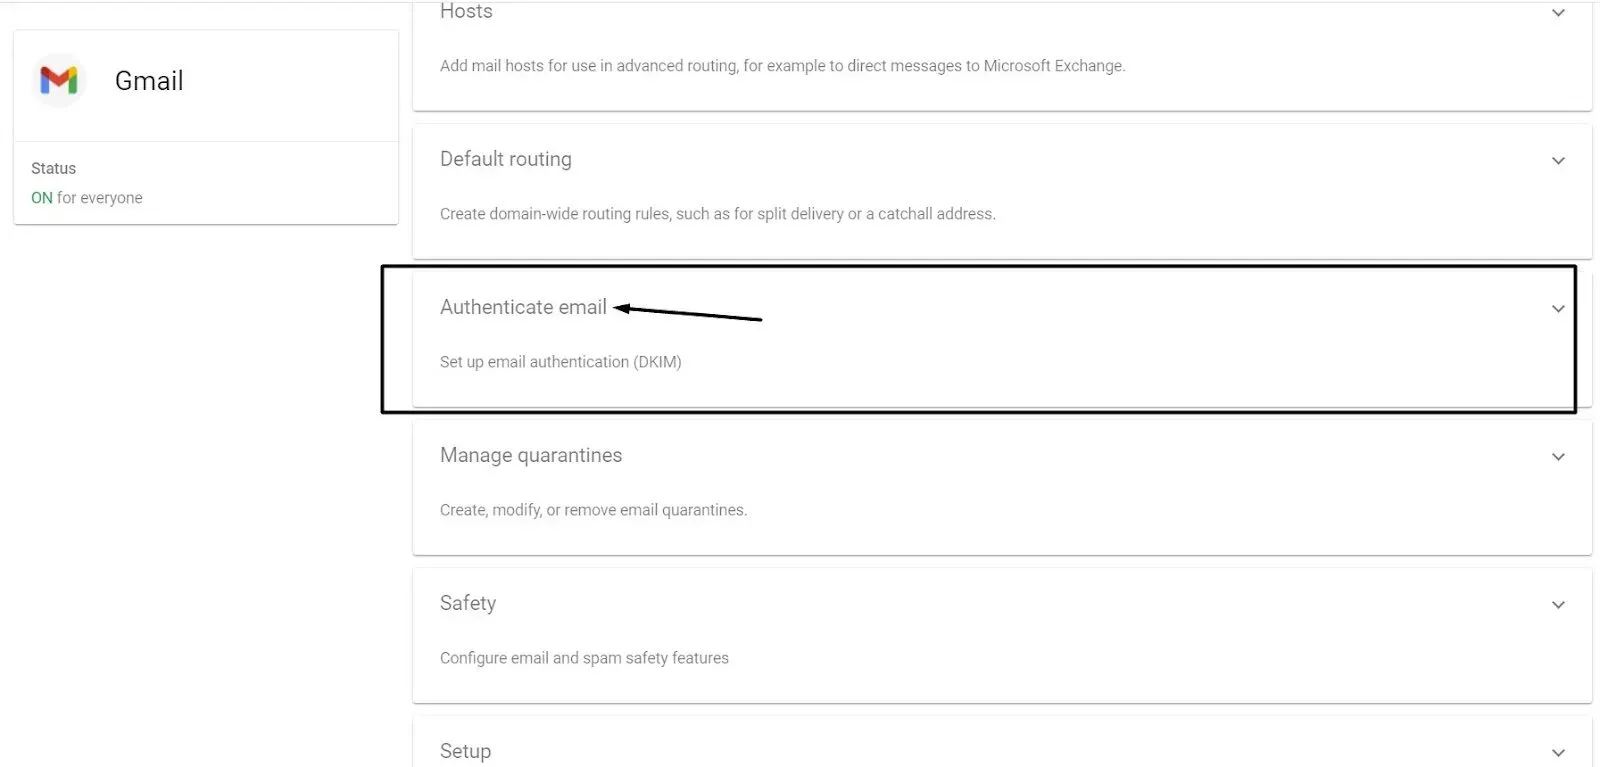
6. Click the Generate New Record button.
a. If your domain provider supports 2048-bit keys, choose this option. Longer passwords are more secure than shorter passwords.
b. If you previously used a 1024-bit key, you can change to a 2049-bit key if your domain supplier allows it.
7. To generate a new record, select Generate at the bottom of the Generate new record. The text string beneath TXT record value moves to a new value.
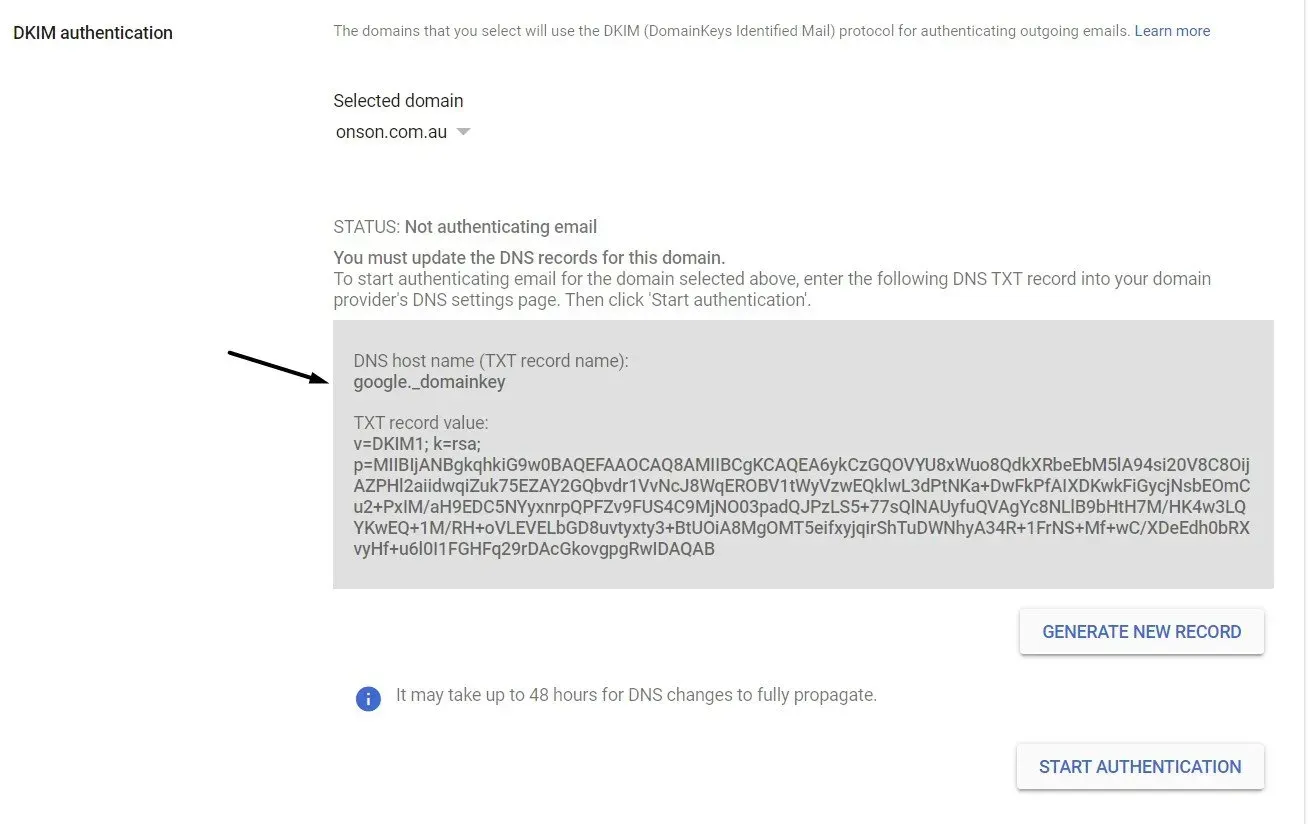
8. Copy the DKIM values from the Authenticate email window.
Step 2: Add your domain's TXT record name and DKIM key.
Sign in to your domain provider and add the DKIM information you got in Step 1.
Remember these things:
- Some domain providers have limits on how long a TXT record can be.
- DKIM can take up to 48 hours to start. After adding a DKIM key, DKIM authentication can take up to 48 hours to start working.
- Multiple domains: If you are setting up DKIM for more than one domain, follow the steps below for each domain. For each domain, you must get a unique DKIM key from the Admin console.
Contact your domain provider if you need help with your domain's sign-in information, settings, or TXT records.
- Sign in to your domain provider's management console.
- Find the page where you can change your domain's DNS settings.
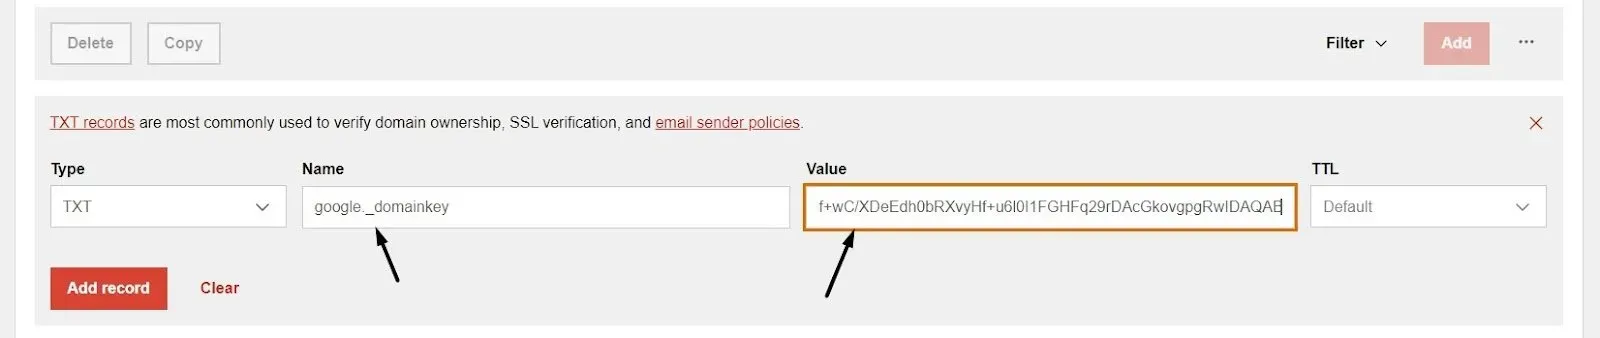
- Add a DKIM TXT record:
- In the first field, type the DNS Host name (the name of the TXT record) that you see in the Admin console.
- In the second field, type the TXT record value (DKIM key) that is shown in the Admin console.
4. Save your changes.
For the next step, go back to your Admin console.
Step 3: Turn on DKIM signing
Important: The message "You must update the DNS records for this domain" could stay on the Authenticate email page of your Google Admin console for up to 48 hours. You can ignore the message if you correctly added your DKIM key to your domain provider.
1. Go to your Google Admin console and sign in. Sign in with an administrator account, not your regular Gmail account.
2. On the Home page of the Admin console, click Apps, then Google Workspace, and then Gmail.
3. Click Authenticate email.
4. Choose the domain where you want to turn on DKIM from the Selected domain menu.
5. Click the "Start authentication" button. When DKIM is set up and working correctly, the status at the top of the page changes to "Authenticating email."

Step 4: Make sure DKIM authentication is turned on
1. Send an email to someone who uses Google Workspace or Gmail. (You can't send yourself a test message to make sure DKIM is on.)
2. Open the message in the inbox of the recipient and look for the whole message header.
Note that the steps to see the message header are different for each email client. To see the headers of a message in Gmail, click More next to Reply and then Show original.
3. Look for Authentication-Results in the header of the message. The headers of incoming messages are written in different ways by different services, but the DKIM results should say something like DKIM=pass or DKIM=OK.
Summing it Up
DKIM is a security measure that businesses can use to improve email deliverability and prevent spoofing and spam. By implementing DKIM, businesses can make it more difficult for attackers to send malicious emails to users.
In addition, DKIM can help reduce the chances that legitimate emails will be marked as spam. While DKIM is not a perfect solution, it is a valuable tool that all businesses should consider improving their email security.
Do you need a quality website or eCommerce store for your business?
Book a meeting with us so we can discuss your needs.


Love My Online Marketing has 10+ Years of working alongside businesses and helping them grow. Discuss your options for online success from website Design and Development through to Google Marketing.
Do you want more traffic and business leads?
Love My Online Marketing is determined to make a business grow. Our only question is, will it be yours?