Crown Street, Wollongong, 2500

Native eCommerce Overview
Melody Jaimon • September 26, 2025
Setting up a shop should not feel like rocket science. This guide keeps it plain and simple so anyone can follow along without overthinking it. We walk through every bit of Native eCommerce step by step and show you where to click, what to set, and when to hit publish.
Quick Menu
Add Products and Options
Goal
Load in your products, add images, and set options like size or colour.
Steps
- Open the store panel then go to Products.
- Click Add Product. Enter title, price, description.
- Upload clear photos. Add at least one main image.
- Use Options/Variants for sizes, colours, or bundles.
- Toggle Track Inventory if you want stock control.
- Save. Repeat for the rest of your items.
About the Product Catalog
The Product Catalog lists all items and uses connected data so changes flow straight onto product pages. When we update a price or image in the catalog, it shows on the live product page automatically.
Organise Products into Categories
Goal
Group items so shoppers can find things fast.
Steps
- Go to Categories.
- Create simple groups like Men, Women, Accessories or by collection.
- Assign products to categories (drag into groups or set while editing).
- Reorder categories so the most important ones show first.
Add Business Information
Goal
Tell customers who we are and keep receipts neat and compliant.
Steps
- Open Business Info in store settings.
- Add business name, email, phone, address and logo if available.
- Confirm region, currency and units so shipping and tax are correct.
- Save.
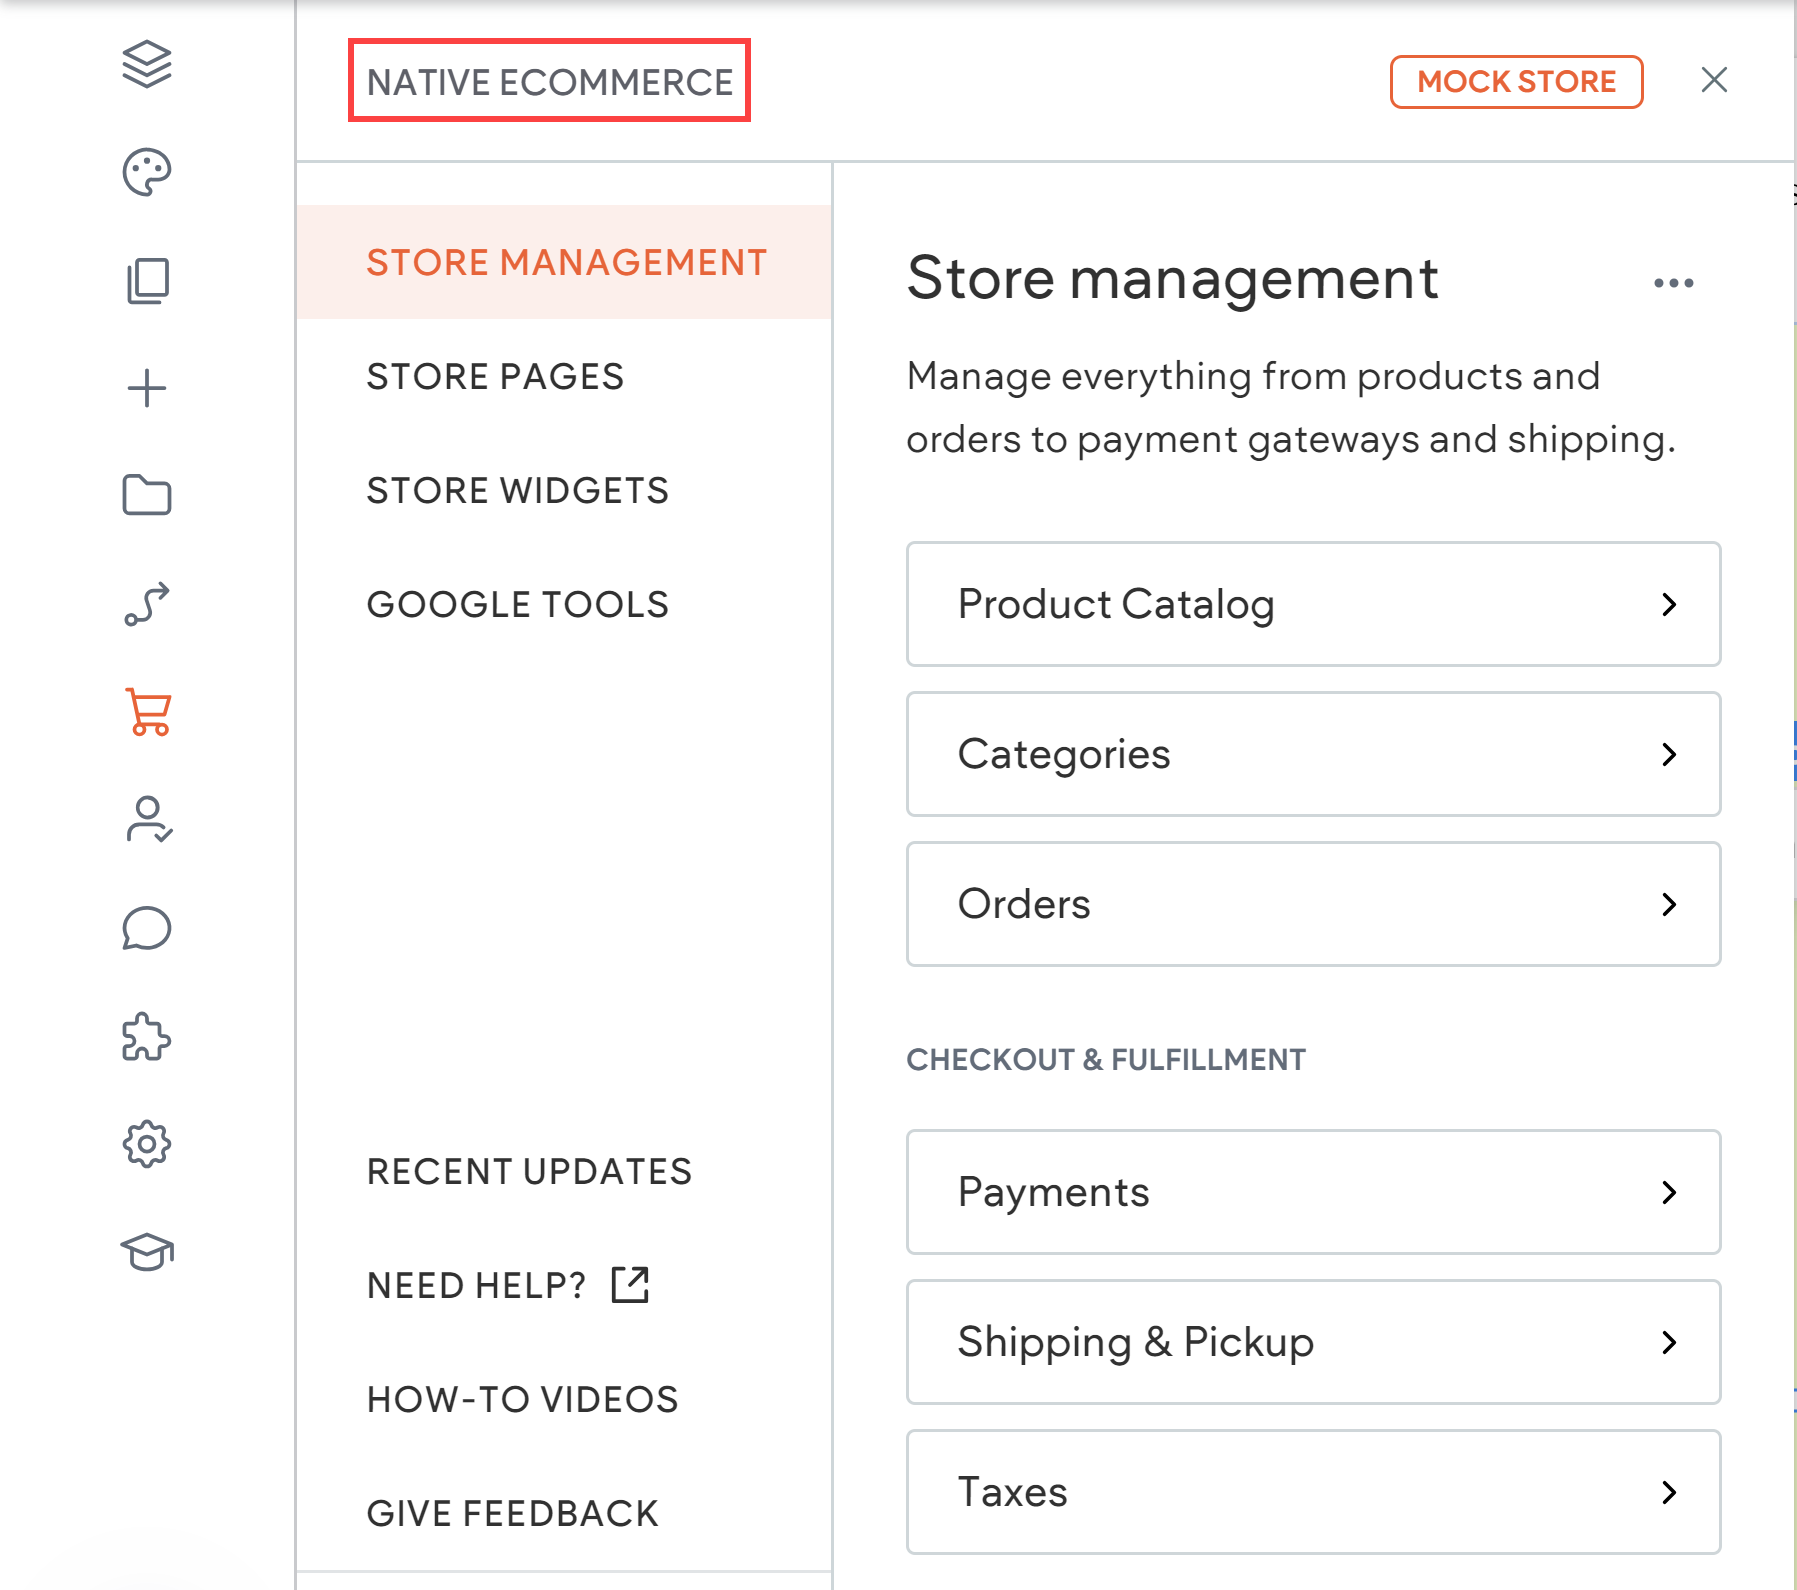
Store management at a glance
Store Management has two parts: Store Settings (business info, payments, taxes, shipping, discounts) and Store Operations (Product Catalog and Orders). Access it from the side panel under eCommerce then Store Management.
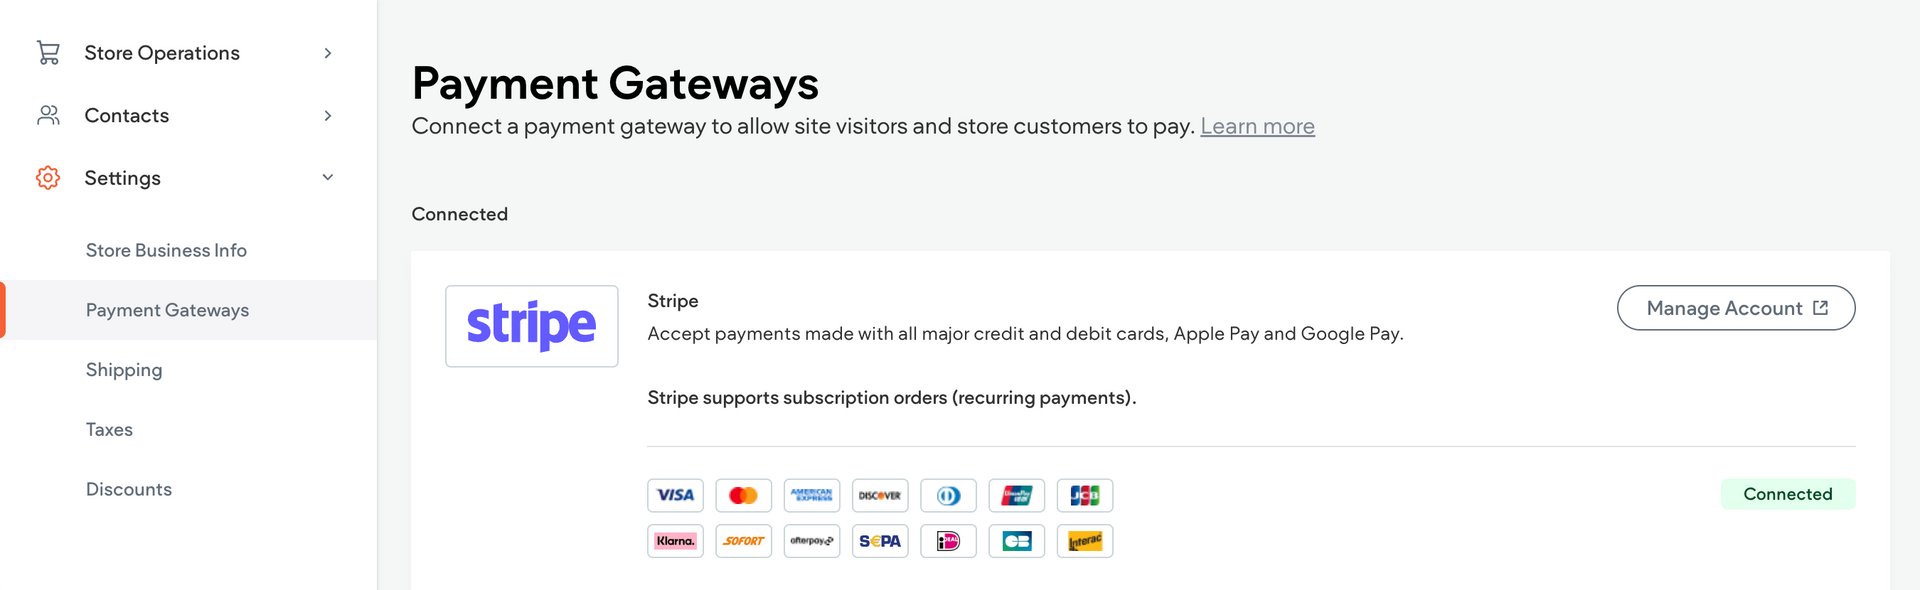
Set Up Payment Providers
Goal
Let customers pay safely with cards or wallets.
Steps
- Go to Payments.
- Pick a provider you support and connect the account.
- Enable test mode if available and place a tiny test order.
- Turn test mode off when ready to trade.
Invoices and tax details
Keep invoices tidy by setting your business details and tax preferences under Store Settings before you go live.
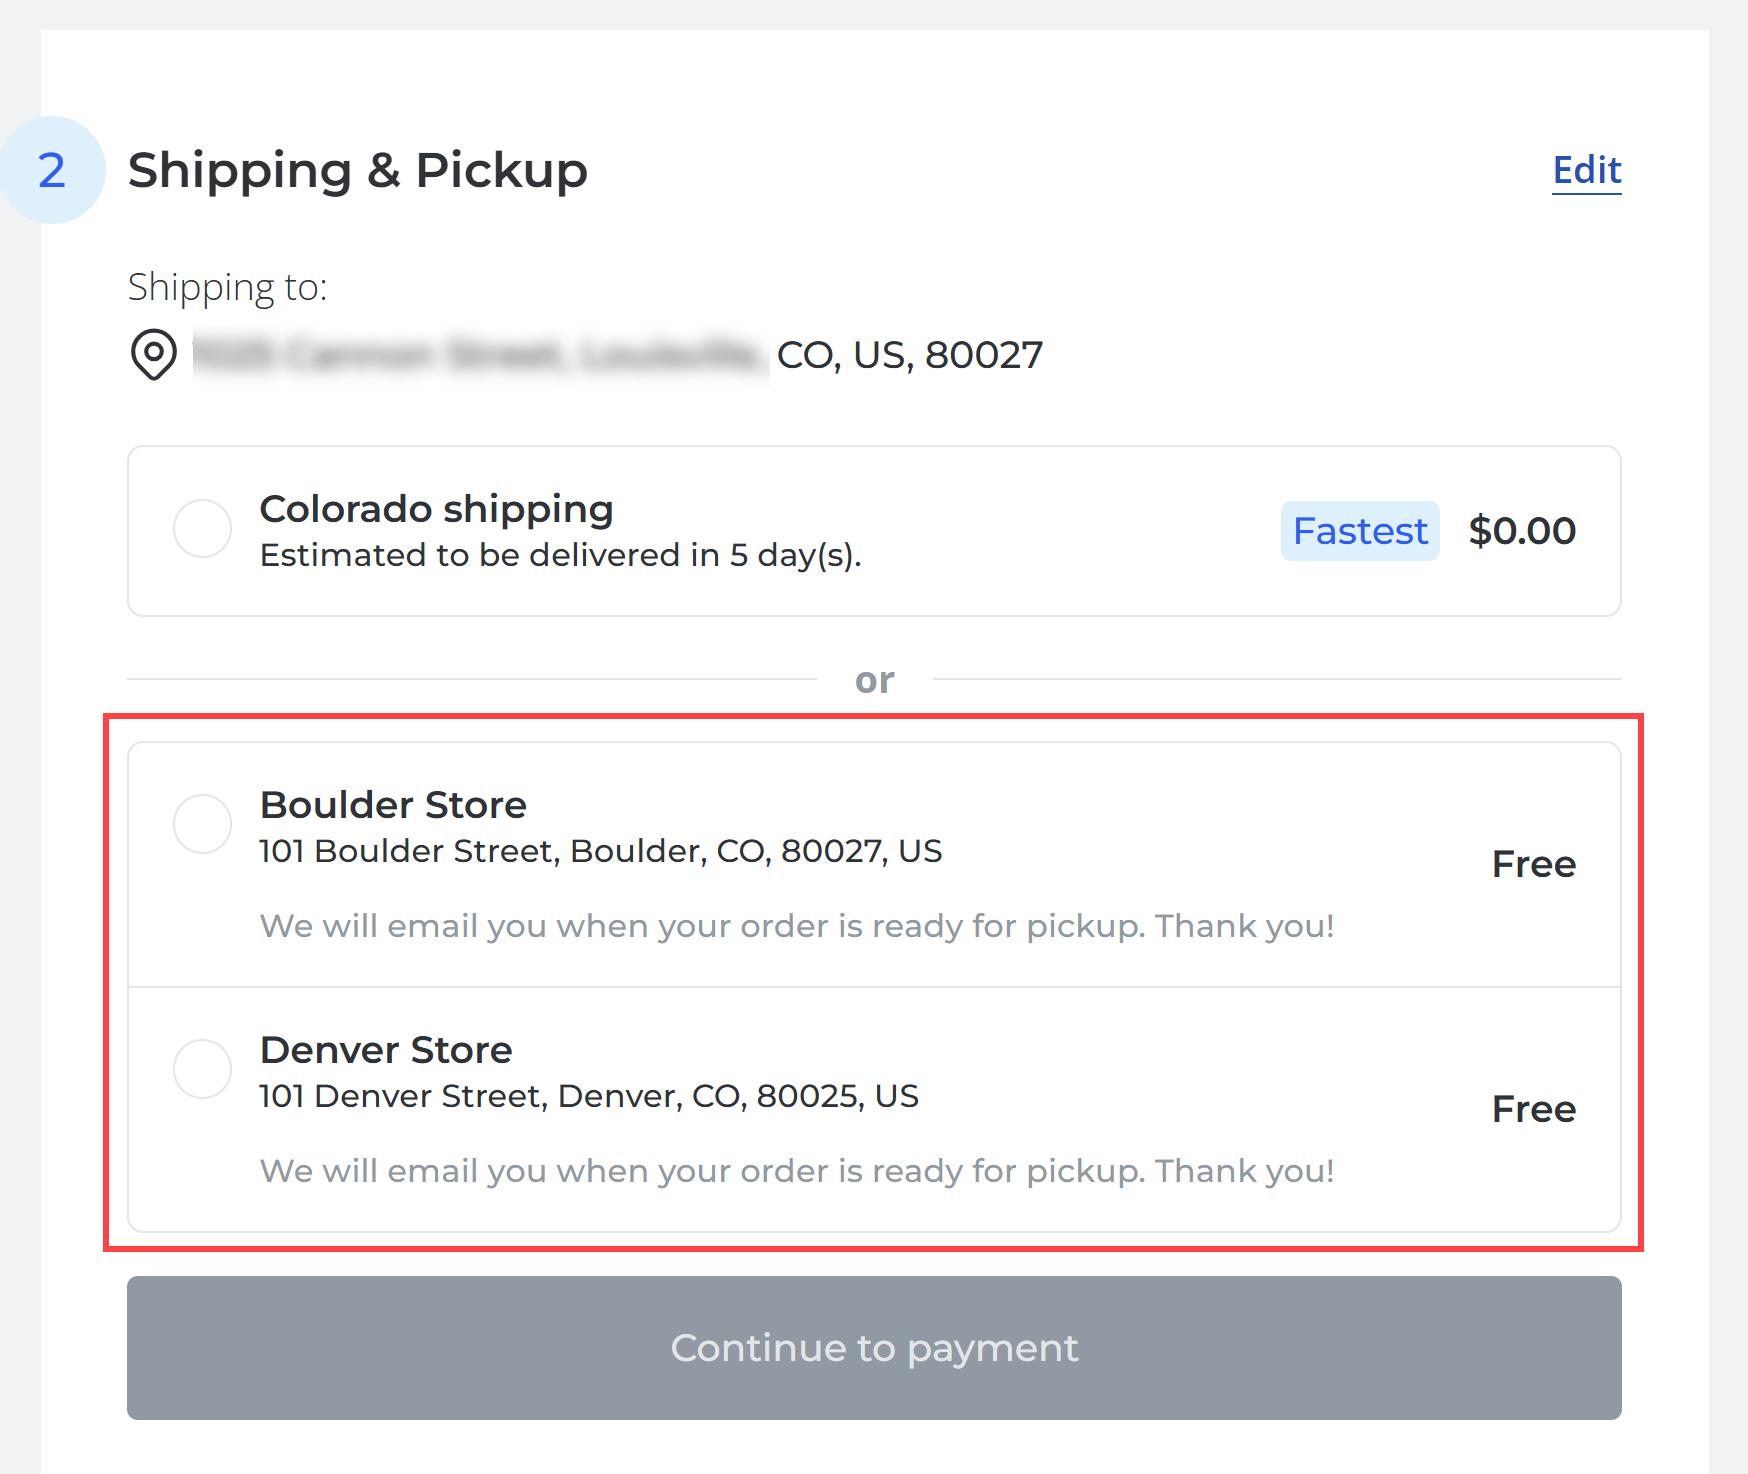
Configure Shipping & Pickup
Goal
Offer delivery methods that suit your customers and your margins.
Steps
- Open Shipping.
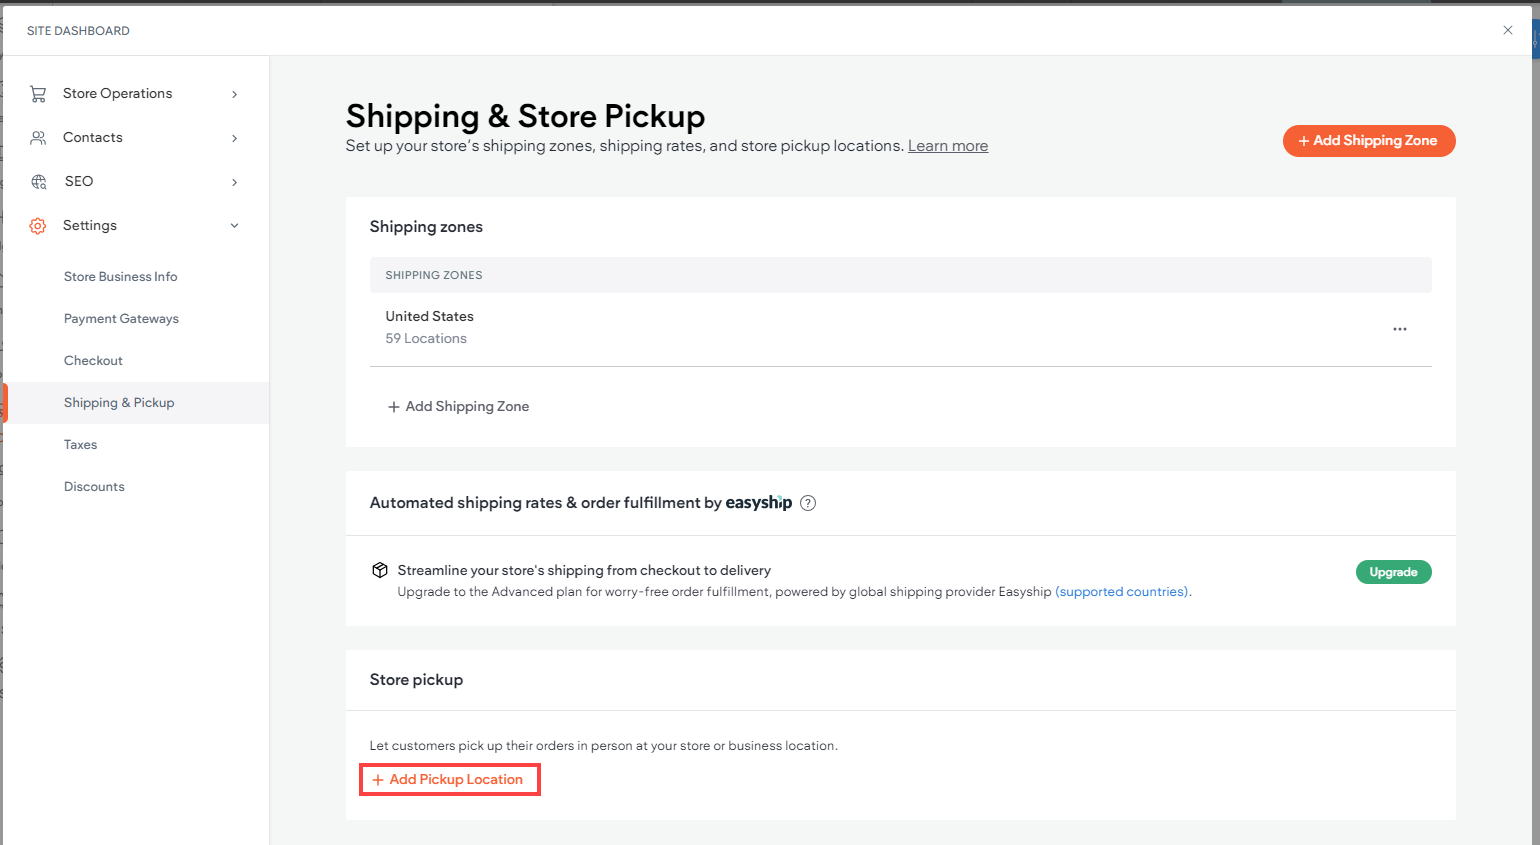
- Create zones (local, domestic, international) if needed.
- Add methods: flat rate, carrier rates, free over a threshold, or Local Pickup.
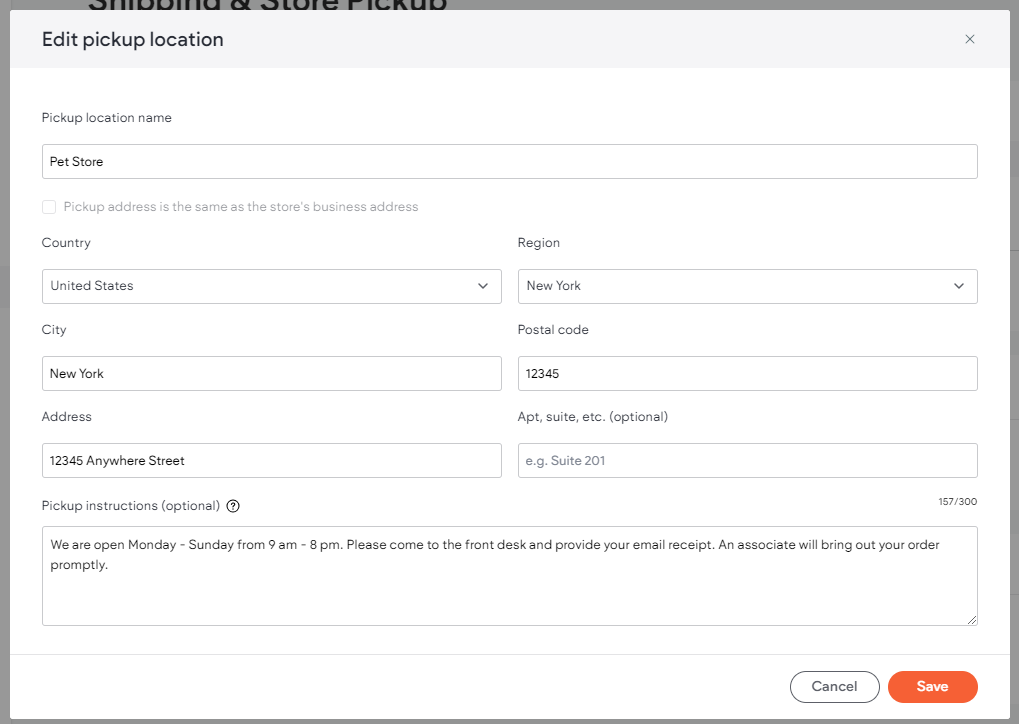
- Set handling time and delivery estimates so expectations are clear.
- Save and test a few addresses at checkout.
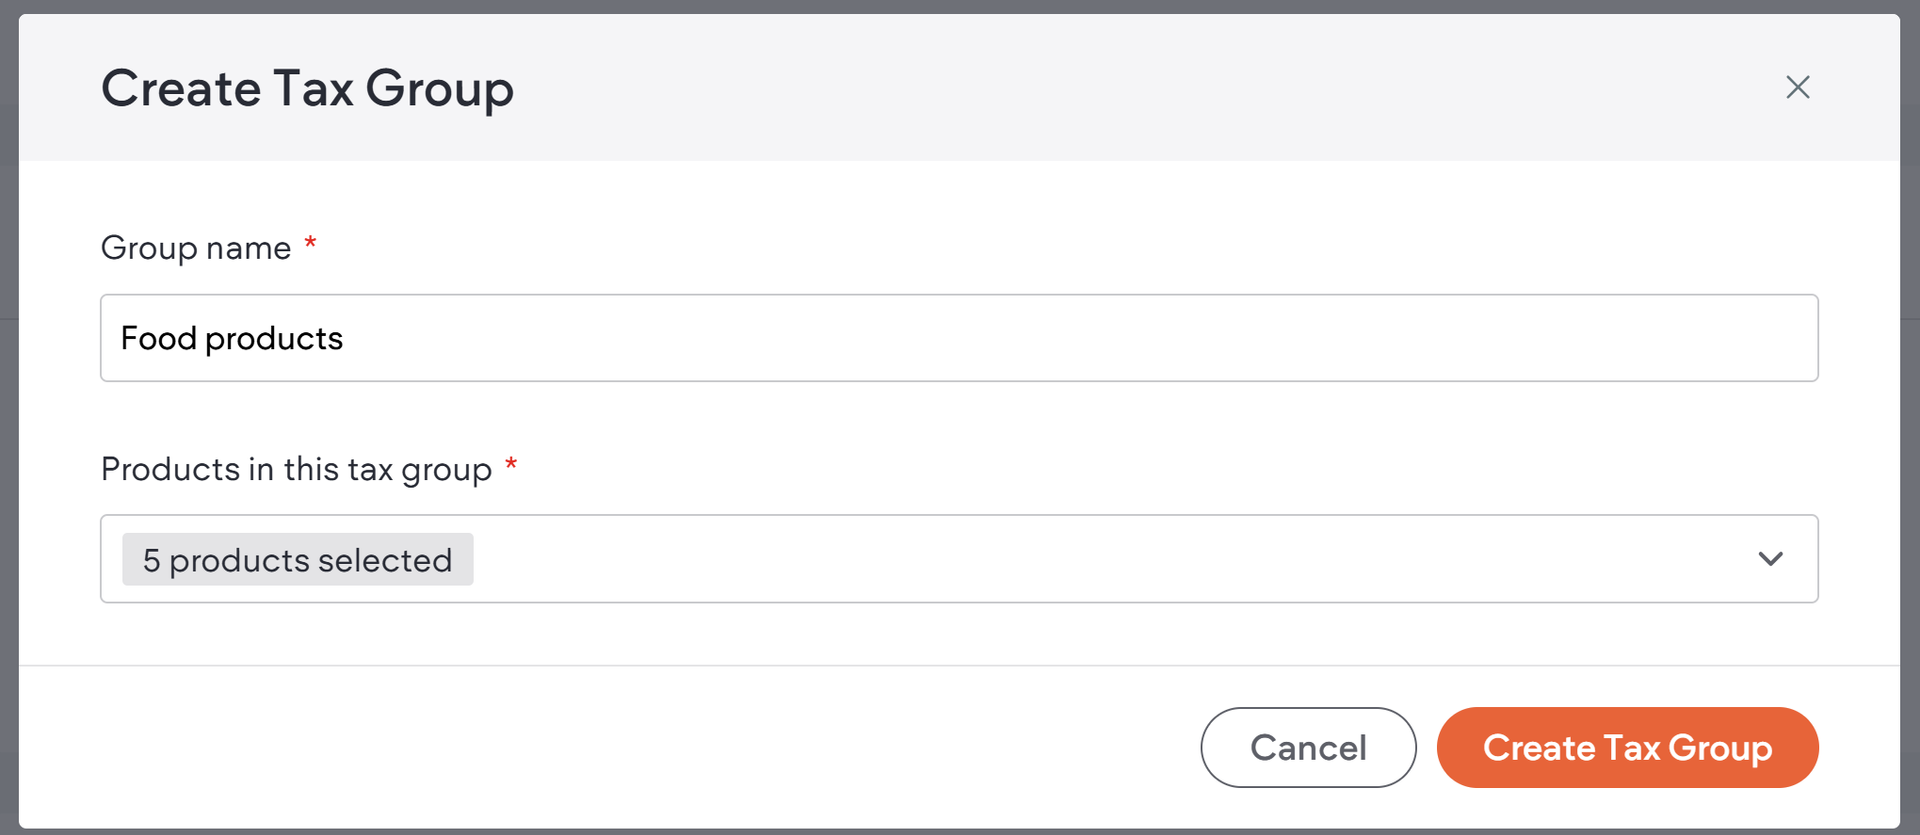
Set Up Taxes
Goal
Charge the right tax for your region and products.
Steps
- Go to Taxes.
- Select automatic rates if supported, or add manual rules.
- Choose tax inclusive or exclusive pricing per your local requirements.
- Save, then run a test checkout to confirm totals.
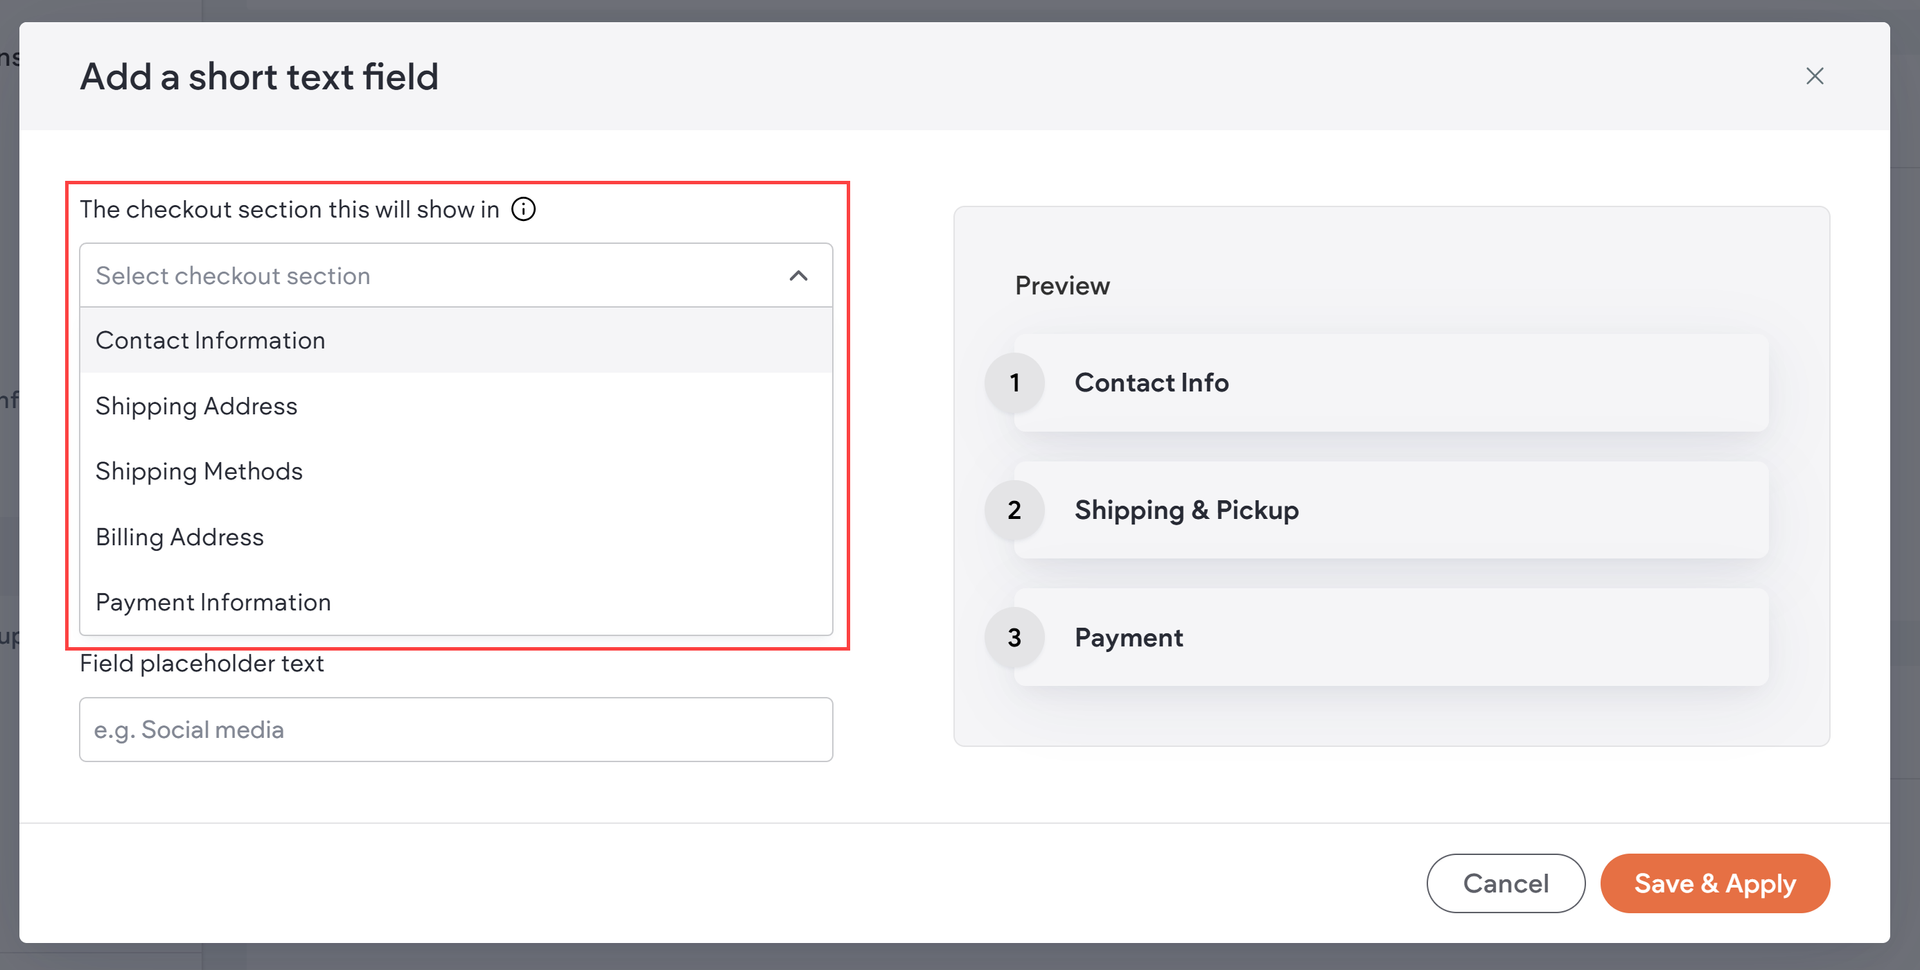
Customise the Checkout
Goal
Make checkout clean, quick, and easy to complete on mobile.
Steps
- Open Checkout settings.
- Show only the fields you truly need to reduce drop-offs.
- Add short shipping or returns notes to build trust.
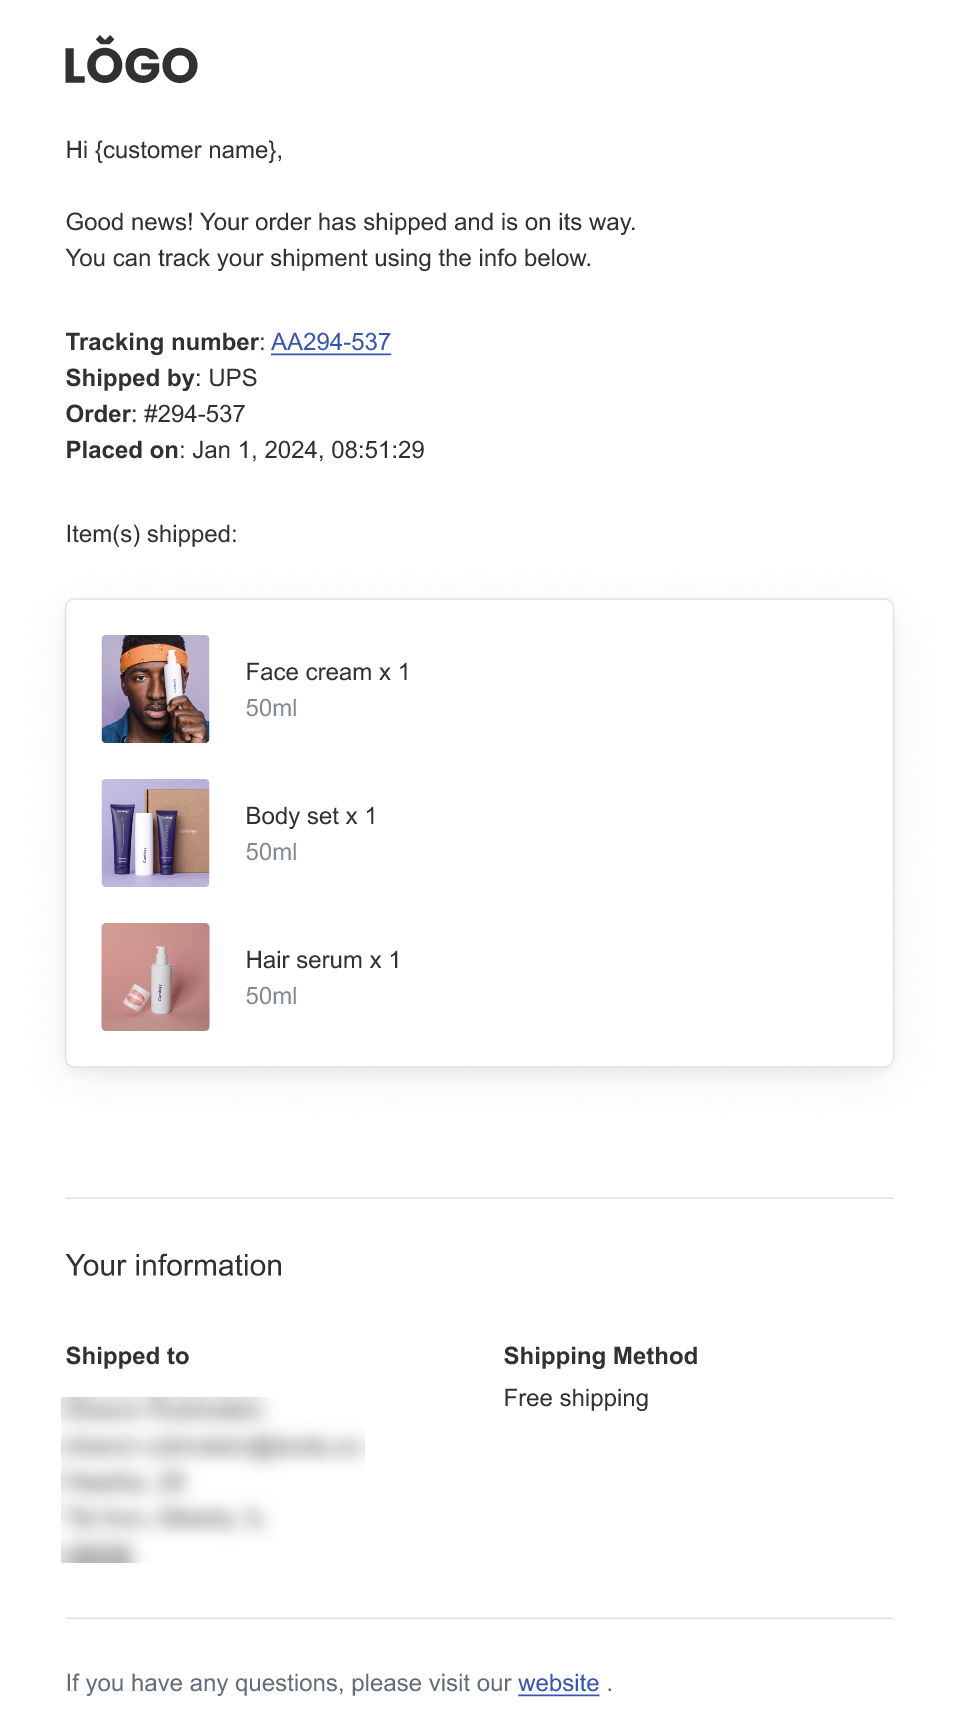
- Turn on order emails and check wording.
- Save and test the flow on a phone.
Design Your Store
Goal
Match the shop to your brand and make products shine.
Steps
- In the page editor, add store widgets like Main Store , Product Gallery , Cart , and Search.
- Use Edit Content to choose what each widget shows.
- Use Edit Design to set fonts, colours, spacing, and grid size.
- Keep image sizes consistent so listings do not jump around.
- Preview desktop, tablet and mobile, then tweak as needed.
Store pages created for you
A Store Homepage and Product Page are auto-created. The homepage uses a Product Gallery by default. The product page is a dynamic page using widgets connected to Product Catalog fields, so changes in the catalog reflect on the page right away.
Core store widgets
- Product Gallery — shows products and links through to product pages.
- Shopping Cart — lets shoppers see items and start checkout. Add this widget to your layout if it is not already present.
Upgrade and Publish
Goal
Turn the lights on and start taking real orders.
Steps
- Choose a plan with eCommerce features if prompted.
- Connect your domain in site settings.
- Do a final small test order.
- Hit Publish. Announce on socials and email.
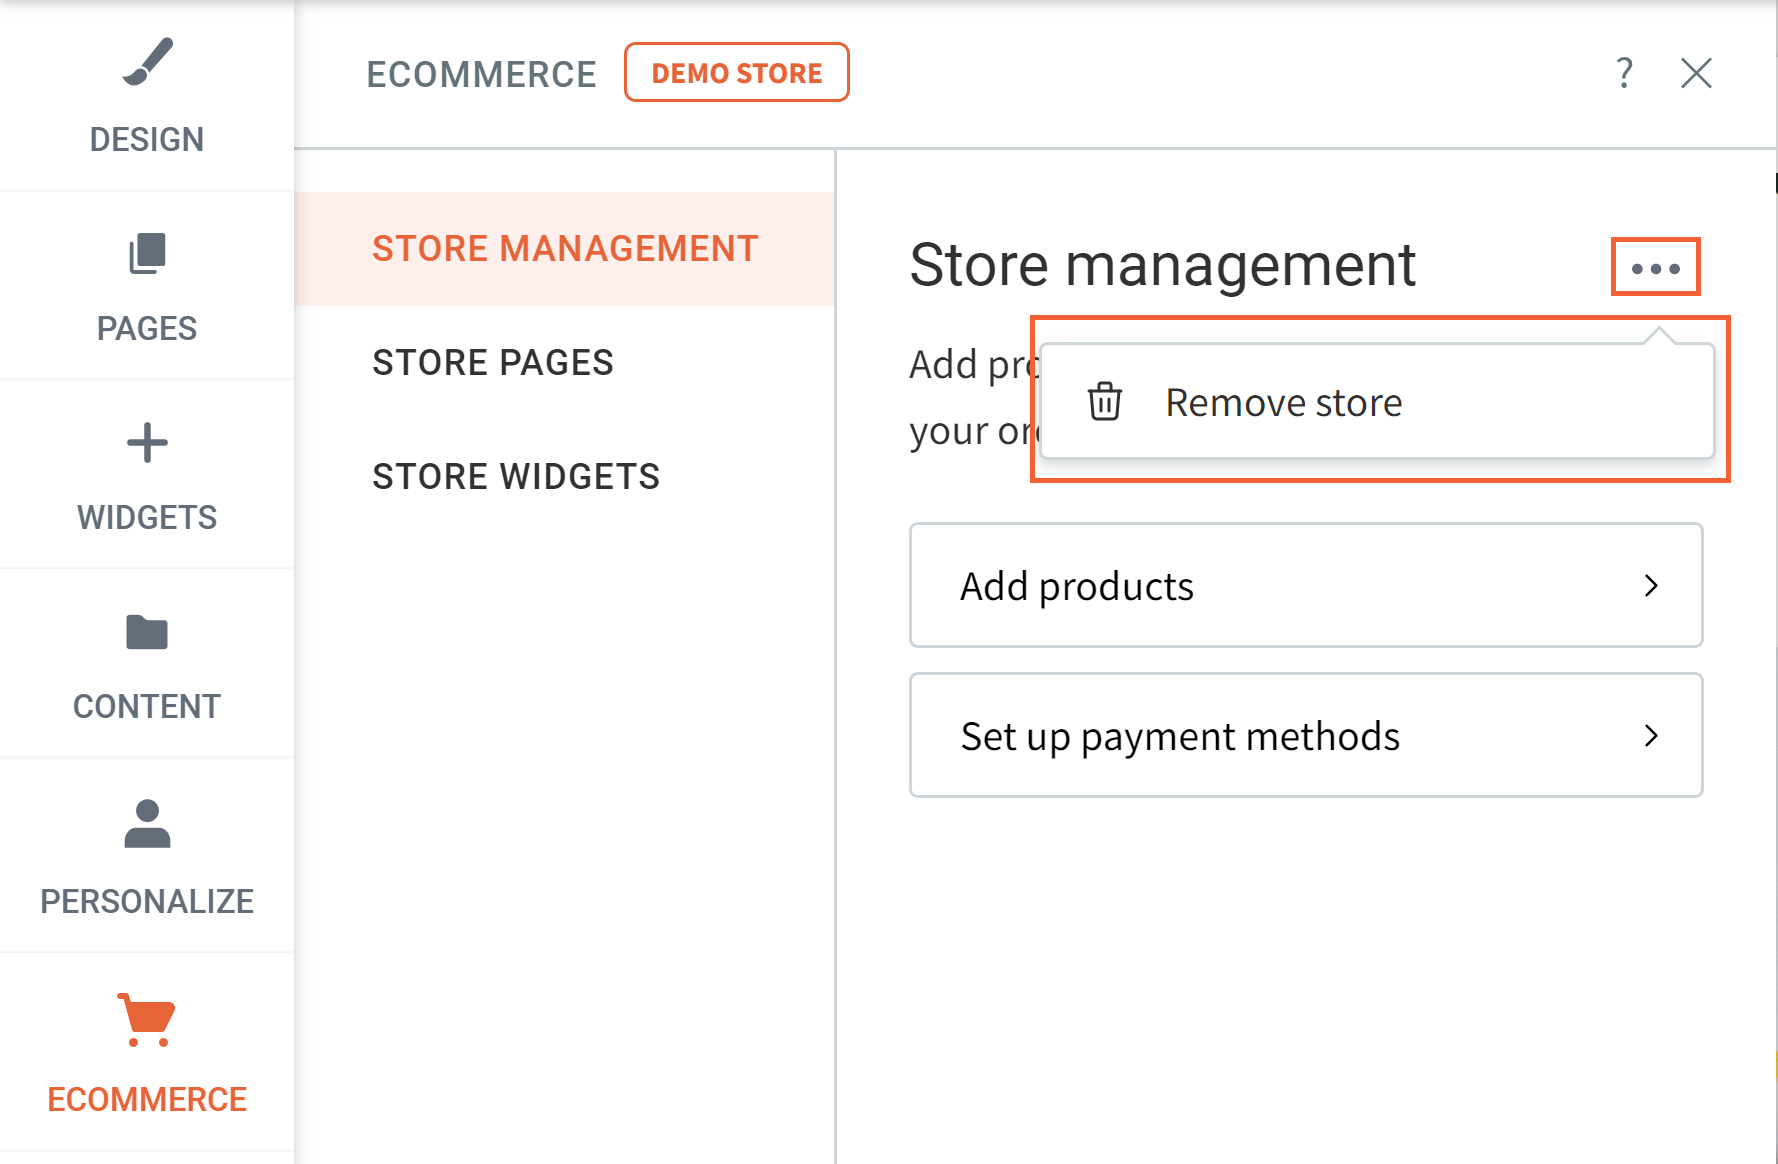
Add or remove the native store
- Add store : open the sidebar, go to eCommerce, choose to add the native store.
- Remove store : eCommerce → Store Management → three dots next to Store Management → Remove Store.
Wrap Up
That is the whole flow. Add products, group them, plug in payments, sort shipping and taxes, tidy the checkout, design the storefront, then publish. Keep testing on your phone and make small improvements each week. You will be selling in no time.


Love My Online Marketing has 10+ Years of working alongside businesses and helping them grow. Discuss your options for online success from website Design and Development through to Google Marketing.
Do you want more traffic and business leads?
Love My Online Marketing is determined to make a business grow. Our only question is, will it be yours?