Crown Street, Wollongong, 2500

Contact Forms
Melody Jaimon • January 19, 2023
To add a complete web form to your site, use the Contact Form widget. You can provide specific text, drop-down, radio buttons, check boxes, date, time, email, and phone numbers to visitors using the Contact Form widget. You can use the form to collect email newsletter sign-ups, customer questions, or simply feedback from site visitors.
- You can add images to display for the options on radio buttons and checkboxes. The images will not appear in the email generated by form submissions, but the label will (even if hidden on the site).
- We do not advocate duplicating contact forms since this often leads to problem with the duplicated contact form.
Add Contact Form
To include the widget:
- Click Widgets in the left panel.
- Drag the Contact Form widget into your website.
See
Add Widgets for more information on adding widgets to your site.
Content Editor
To open the content editor, right-click the widget and choose Edit Content.
On the
Form Items tab, click:
- Determine what information you want to collect from your visitors and then modify the existing fields by clicking the field's name. Click
Add Field to add new fields. If your form has a File Attachment field, the file name cannot contain a space when uploaded. Attachments have a file size limit of 10MB.
- Enter the text that should appear on the Submit button.
- New forms include reCAPTCHA validation by default. This keeps spammers out of your form and speeds up the form submission process for site visitors. Choose a reCAPTCHA position. Choose whether to show the reCAPTCHA as an icon or text in the form.
- Fill in the Form title. Click the eye icon to hide the form title. When you change the form's title, the title changes only after a new response is submitted. To quickly change the form name, submit a test response and wait a few minutes for the form to update. In the Submissions section:
- Click
Submission recipients to configure the email address and subject for receiving form responses. To receive a copy of the information submitted, enter the email address in the Submission recipients step. If the Submission recipient field is left blank, the primary email address in the content library will be used. If such an email does not exist, the account owner will be the default submission recipient. All responses are directed to the
form responses page.
- Click Submission actions to configure the confirmation and error messages that appear when visitors submit a form. To add colour, emphasis (bold, italics, and underline), and bullets to text in the message boxes, use the Rich Text Editor. To have the form redirect to a page after submission, toggle the Redirect to a page after submission toggle and select the page.
- To add a tracking code to your form, go to Tracking and paste your conversion code or AdWords into the provided field.
Send successful submission data to a third-party service via the
Integration tab. See
Contact Form Integrations for more information.
Design Editor
Right-click the Contact Form widget and select
Edit Design to open the contact form design editor. You can change the button layout, items, frame, and spacing in the design editor.
Layout
On the Layout tab:
- To choose a layout design for the contact form, click the layout icon.
- Click Left or Right to change the form alignment.
Item
On the Item tab, click:
- Click Fields to make changes to the field style and text.
- Click Button to change the button style and text. Click Revert to global design to return to the default style.
Frame
On the Frame tab:
- Click Frame Style to make changes to the frame style. You can change the background colour or add an image.
- Click Form Title to change the text style of the title.
- Click the Submission Message to change the text style of the submission notification.
Spacing
Click the Spacing tab to make changes to the contact form's padding and margins. See Outer and Inner Spacing for more information on spacing.
See
Contact Form Troubleshooting if you're having problems with the contact form.
Add Connected Data
You can link the email address to the content library or to a collection's email field. You can also add collection fields to the email subject or as external fields sent in the form, such as apartment ID or team member name. These extra fields will be available not only in the form email but also when viewing the form responses data from the site overview. See the Product Overview for additional use cases. More information on connected data can be found at Connected Data.
To add linked data to a contact form, do the following:
- Select Connect to Data by right-clicking the widget.
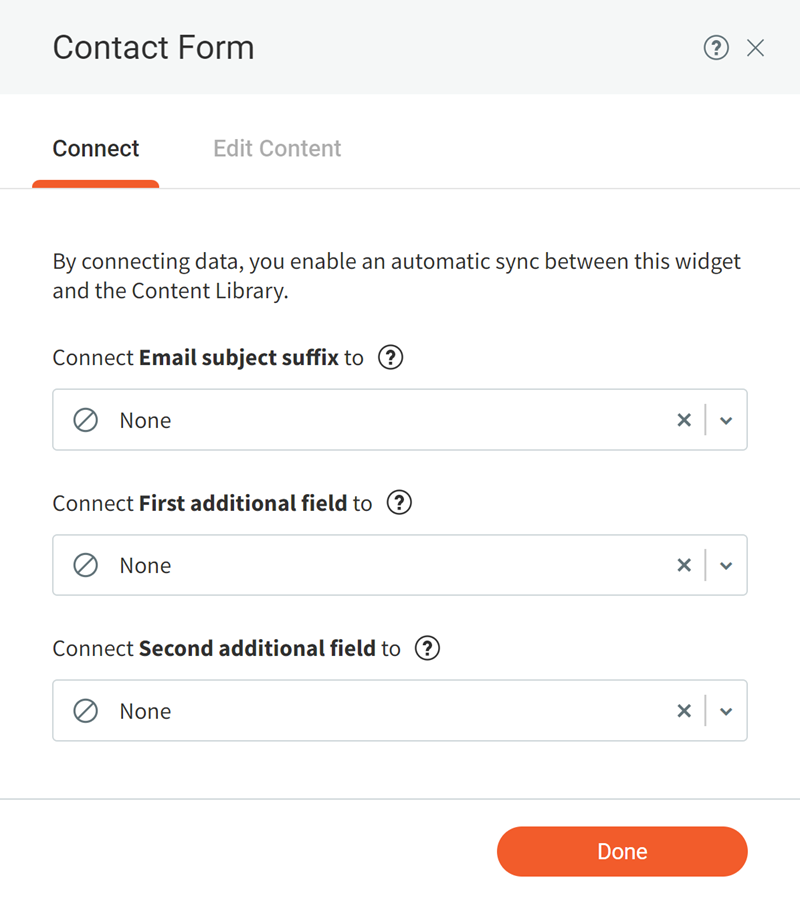
- Choose the email address and other fields to include in the contact form email.
- (Optional) Make any necessary changes to the content by clicking Edit Content. All modifications will be synchronised with your content library.
- Click the Done button.


Love My Online Marketing has 10+ Years of working alongside businesses and helping them grow. Discuss your options for online success from website Design and Development through to Google Marketing.
Do you want more traffic and business leads?
Love My Online Marketing is determined to make a business grow. Our only question is, will it be yours?